Lipstick Red Crop Crochet Top
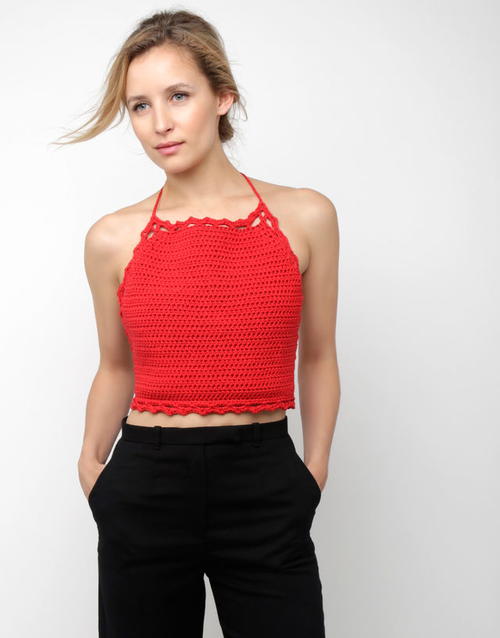
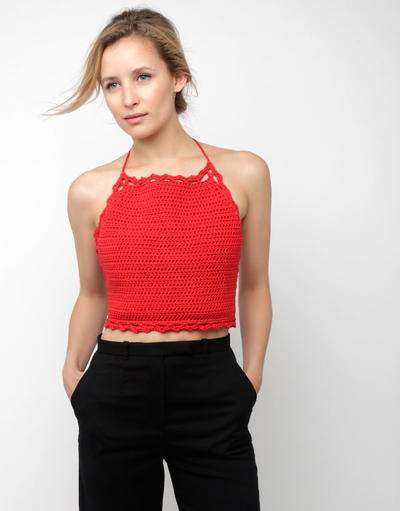
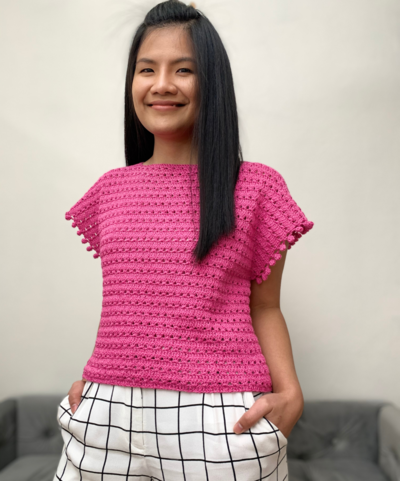
Bright and fiery, the Lipstick Red Crop Crochet Top is a fabulous crochet top pattern that's perfect for the summer heat. This intermediate pattern can be worn so many ways, you'll be wearing it all summer long! From rocking it at a music festival with shorts to pairing it with a high waisted maxi skirt for a barbeque or picnic, this top is so versatile. It's also great as part of your swimsuit coverup! Worked up with 2 balls of yarn and using half-double crochet stitches, this crochet pattern can be customized in your favorite color and comes in two sizes, small and medium/large.

Crochet HookH/8 or 5 mm hook
Yarn Weight(4) Medium Weight/Worsted Weight and Aran (16-20 stitches to 4 inches)
Crochet GaugeIn Half double crochet: 10cm/4” = 14 stitches; 10cm/4” = 11.5 rows
Finished SizeSmall, Medium/Large
Materials List
- 2 balls of WATG’s Shiny Happy Cotton
- 1 5mm crochet hook
- 1 sewing needle
Lipstick Red Pattern
For pattern schematics, click here for the diagram.
Main Piece
-
Make a foundation chain of 90 [100] chain stitches. (Take care not to make your stitches too tight!)
-
Make 2 chain stitches (this is your turning chain), then make a half double crochet stitch into the 3rd stitch from the hook. Work in half double crochet into each of the remaining 89 [99] stitches of your row. After working the last stitch, turn your piece around so that the stitch attached to the crochet hook is on the right-hand side. You are now ready to work the next row.
-
Repeat step 2 a further 3 times.
-
Work 15 stitches in slip stitch. These 15 stitches won’t be worked any more - they will form the first back band. Tie a little snippet of yarn (= yarn marker) to the last stitch you worked to mark this point.
-
Make 2 chain stitches, then work in half double crochet until you have 15 stitches left of your row. Tie another yarn marker into the next stitch to mark this point, and leave the remaining stitches of your row without working them. (They will form the second back band.) Turn your piece around, ready to work the next row. You now have 60 [70] stitches between your snippets of yarn - these are the only stitches you’ll be working across from now on.
-
Make a turning chain of 2 stitches. Work a half double crochet stitch into the next stitch, then make a half double crochet decrease. Work in half double crochet until you have 3 stitches left before the yarn snippet that marks the new end of your row. Make a half double crochet decrease, then work the last stitch in half double crochet. You now have 58 [68] stitches left.
-
Work 1 row in half double crochet.
-
Repeat steps 6 and 7. (56 [66] stitches.)
-
Work 2 rows in half double crochet.
-
Repeat step 6. (54 [64] stitches.)
-
Work 3 rows in half double crochet.
-
Repeat steps 10 and 11 twice more. (50 [60] stitches.)
-
Repeat step 6 a further 12 [18] times - you now have 26 stitches remaining, and the main piece of your top is done!
Lace Trim
Instead of flipping your piece around, you will now work all around your piece to prepare the edges for the lace trim.
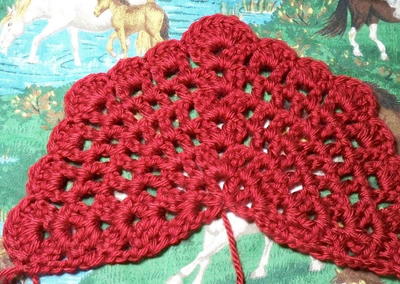
There are 60 [72] little “holes” along each sloped side edge - 2 holes for each row you have worked.
-
Working in single crochet, start with the first sloped edge and *work 1 stitch into the side of the next 3 rows, then work 1 stitch in between the last stitch worked and the next row.* Repeat the section inside the stars until you reach the back band.
-
Work in single crochet along the top edge of the first back band until you get to the last stitch of your row. Work 3 stitches into the last stitch - this creates a neat corner.
-
Work into each of the stitches along the short edge of the back band. Work 3 stitches into the corner stitch as before.
-
Work in single crochet along the bottom edge of your halterneck, then work 3 stitches into the last stitch.
-
Repeat step 16.
-
Work in single crochet along the top edge of your back band.
-
Now work in single crochet along the second sloped edge of your top: *work 1 stitch into the side of the next 3 rows, then work 1 stitch in between the last stitch worked and the next row.* Repeat the section inside the stars until you get to the top edge of your piece (you don’t need to crochet along this edge). Finish off your round by making a slip stitch into the first stitch of the top edge.
-
Make 3 chain stitches. *Make 3 chain stitches (taking care not to make the stitches too tight!), skip the next 3 stitches, then work a double crochet stitch in the next stitch.* Repeat the section inside the stars until you reach the first corner. Turn the corner by working a double crochet stitch into the corner stitch, making 3 chain stitches, then working a double crochet stitch into the same stitch.
-
Continue repeating the section inside the stars all around the edges of your top. When you get to the outside corners, turn them as before. After completing all the edges, join the round with a slip stitch to the first loop of chain stitches you made.
-
Your edges now have little ‘loops’ made of chain stitches - each of these is a chain space. For your final round, you will work your stitches into the chain spaces: instead of starting each stitch by inserting your hook into an individual stitch, you insert it into the middle of the chain space, so your stitches end up covering the initial chain space.
*Work 2 single crochet stitches, make 3 chain stitches, then work 2 single crochet stitches* into the first chain space. Repeat the section inside the stars for each of the chain spaces around all edges of your top. Join your round with a slip stitch into the first stitch. Cut the yarn, leaving a 15cm/6” tail. Pull on the last loop until the end pops through - you have now secured the last stitch.
Straps & Ties
-
Work 60 chain stitches, then cut the yarn and secure the last stitch. Attach it to one of the top corners of your top.
-
Repeat step 24 for the other top corner.
-
Make another 4 ties and attach 2 to each back band.
Read NextWhite Spider Lace Jacket
vsjones1 6108523
Sep 14, 2019
Reading thru the pattern, I see a problem. Step 5 of the Lace trim says "Repeat step 16". There is no step 16 anywhere in the pattern.
Delphine Bryant
Aug 02, 2018
This is a really sassy top. Directions show that the top can be made in three sizes but in the directions for the stitches there are only two numbers indicated. Are the number stitches for small/medium or medium/large?
Morehouse17
Jul 28, 2018
According to the directions for the lipstick red crop crochet top, this is worked from the bottom to the top. By reading the directions, they seem easy enough but you really do not know if you will have any issues until you actually begin to crochet.
flowergirl
Dec 05, 2017
This top is so simple to make. Beginners would make this in such a short time. I love how the pattern is written, but i feel like it should be a halter top. Luckily you can reduce the pattern as you work up. i like the lace detail on it, it gives it a delicate feel perfect for summer.
achumley0003 31706 34
Aug 24, 2017
I really like this pattern. It is a cute basic tank top pattern, which make it a great starting point if you wanted to make some changes to make it different. The stitch pattern could be changed easily and you could make some changes to make it longer. You could even make it shorter and add fringe to the end and that would add some coverage also. I really love the color that was used,also, but it would look great in any color of your choosing.
Cheryl Y
Sep 23, 2016
I really like the look of this Lipstick Red Crop Crochet Top. The pattern is very well written and looks like it will be easy to follow. I'm looking forward to making this in red and a few other colors. This will be my go to top next summer for sure! Thank you so much for sharing this free crochet pattern.
Report Inappropriate Comment
Are you sure you would like to report this comment? It will be flagged for our moderators to take action.
Thank you for taking the time to improve the content on our site.

