This project was submitted by one of our readers, just like you.
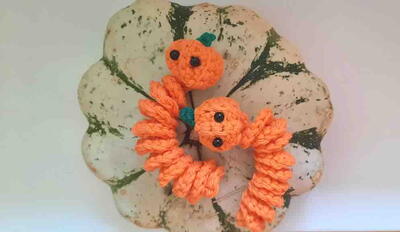
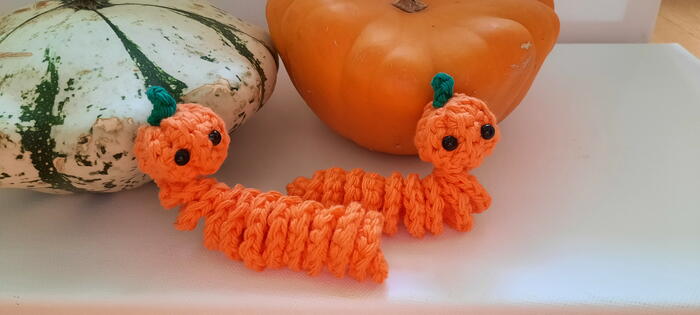
Pumpkin Worry Worm
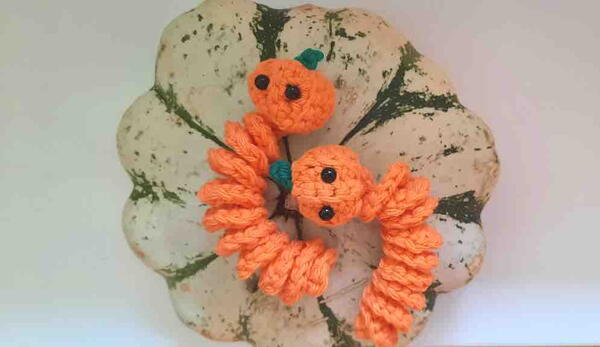
PUMPKIN WORRY WORM CROCHET PATTERN
Crochet worry worms became a real hit when a FB Group called “Random Acts of Crochet Kindness” came up with the idea to distribute these simple crochet worry worms with a poem packaged in a small see-through plastic baggie or organza bag anywhere you can think of… in the woods, playground, nursing home, school, camping area… wherever.
These cute crochet worry worms are meant to put a smile on whoever finds them and comfort them in times of sorrow or stress.
The idea of these worry worms is to go out of one’s way to make another person smile. It builds a sense of community in kind acts, and attempts to make the world a bit lighter and brighter!
The best thing about these crochet worry worms is that they are super easy and fast to whip up, which make them ideal projects for beginner crocheters.
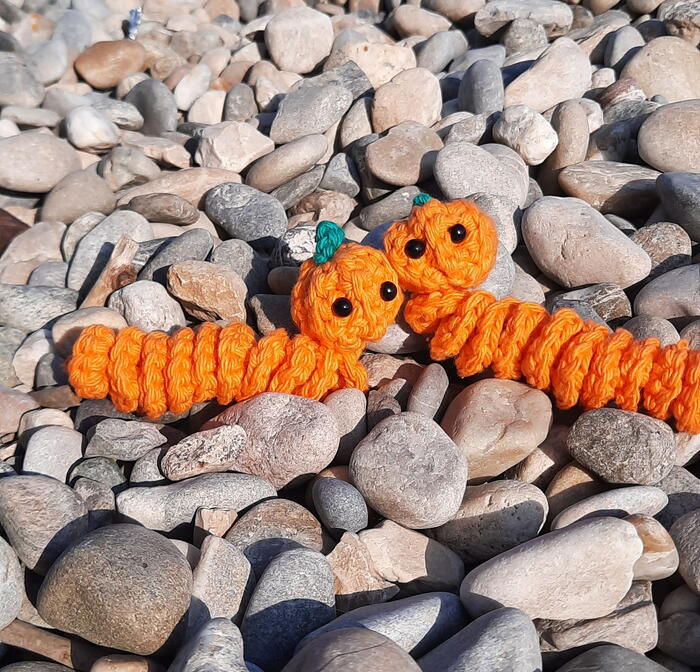
Now that autumn is approaching, I want to show you how to crochet themed worry worms for the upcoming Halloween season.
These worry worms are also super simple to make and will definitely put big smiles on little faces!
Not only will you feel accomplished when you’ve created a few of these, you’ll also feel great about yourself when you actually go out and hide them around your neighbourhood for people to find them and brighten up their day
MATERIALS
Some cotton yarn. I used Lily’s Sugar & Cream from LoveCrafts.
Crochet hook that fits your yarn. I used a size G/4mm hook.
Stitch markers or a piece of contrasting color yarn (optional)
A tapestry needle
A pair of scissors
Trimits Toy Eyes Solid Black - 6mm, Goggly eyes, or black / brown fiber art beads, or a permanent marker
Fluffy cotton filling, fiberfill or a few strands of leftover yarn
Plastic or organza baggies
Printer & A4 paper to print your tags. You could choose to print your tags on cardstock to make them more durable.
ABBREVIATIONS
ch = chain
sc = single crochet
scBLO = single crochet back loop only
sl st = slip stitch
st = stitch
sts = stitches
fo = fasten off
Skill Level
Beginner - this pattern uses basic stitches used in different ways. You do not need to have amigurumi experience as this pattern is worked flat.
MEASUREMENTS
Length = 5.5” / 14 cm
Weight = 0.28 oz/ 8 g
Yardage = 13.4 yards / 12.3 m of yarn
In this post, you will find a text-only printable version of the Pumpkin Worry Worm.
A second printable is for Worry Worm Poems that you could add as tags to your worry worms if distributing for Random Acts of Crochet Kindness.
TESTER RECOGNITION
Thank you to all the testers who volunteered to test this pattern for me. I really appreciate your time, effort & feedback.
Mrs Theresa Nel
Darlene Terhune
Bibi Burger Jantjies
Sarah Jo Schmitt
Mary-Jo Harding
Lynne Skinner
Christine Beaton
Carol Danys
Amanda Dixon
Mousumi Mitra
Samantha Restivo
Carol R. Stive
You may sell any finished products that you make from this pattern. However, when selling online, please tag me on social with hashtag #startcrochet or @StartCrochet
Thank you!

Crochet HookG/6 or 4 mm hook
Yarn Weight(4) Medium Weight/Worsted Weight and Aran (16-20 stitches to 4 inches)
Crochet Gauge12 sc and 12 rows with a 4.5 mm crochet hook
Gauge is not really that crucial for this tutorial. Just try experimenting with different hook sizes & different weight yarns to get a gauge you are happy with for the project you are working on.
If your worry worm looks smaller than you anticipated, try a thicker weight yarn or a smaller size crochet hook.
If you are using bulky yarn, you might want to decrease the number of repeated stitches in the body chain to 3 sc per ch instead of 4.
If you want your worry worm to be longer, just increase the number of stitches in your body chain.
Finished Size5.5" / 14 cm
Materials List
-
Some cotton yarn. I used Lily's Sugar & Cream from LoveCrafts.
-
Crochet hook that fits your yarn. I used a size G/4mm hook.
-
Stitch markers or a piece of contrasting color yarn (optional)
-
A tapestry needle
-
A pair of scissors
-
Trimits Toy Eyes Solid Black - 6mm, Goggly eyes, or black / brown fiber art beads, or a permanent marker
-
Fluffy cotton filling, fiberfill or a few strands of leftover yarn
-
Plastic or organza baggies
- Printer & A4 paper to print your tags. You could choose to print your tags on cardstock to make them more durable.
Read Next24 Light and Lacy Crochet Patterns


