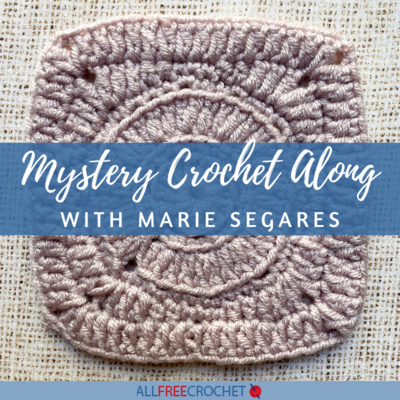
2021 Summer Mystery Crochet Along
Join us every week in May for a mysterious crochet along that results in an exciting trendy project!
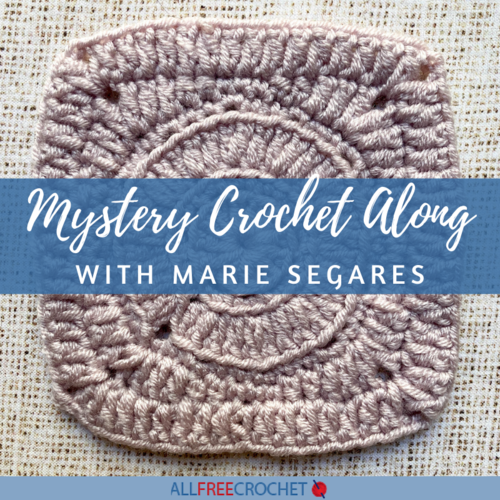
It's no secret that crochet alongs (CALs) are incredibly popular. Like a book club, working up a project in parts is exciting and less stressful than doing it all at once. Adding to the excitement is the mystery factor of our May 2021 Mystery Crochet Along.
We've joined forces with the incredibly talented Marie Segares from Underground Crafter to bring you this crochet along, so you know the end result will be as gorgeous as it is fun to crochet.
But here's the twist: you won't know what you're crocheting right away! Looking for a hint? It's a piece that you're going to love for summer but want to keep around long after the sun and heat fades.
Our mystery crochet along is not one to miss. Join us every Wednesday in May for each exciting new installment of an exclusive pattern by the wonderfully skilled Marie Segares.
How do I join? In order to be updated with the latest set of instructions every week, make sure that you're subscribed to the Hooked on Crochet newsletter from AllFreeCrochet, and keep an eye on your inbox! We'll be sure to send you an email each week to bring you the next step in the crochet along.
PLUS! Don't forget to share with us your progress every week in the comments down below. We can't wait to see how yours turn out!
Week 1: Welcome, Supplies, and Gauge Swatch
Welcome to the mystery crochet along! I’m Marie from Underground Crafter and I’m excited to be back for another mystery crochet along on AllFreeCrochet!
In this post, I’m including a complete supply list and schedule for the crochet along, along with tips for finding the right tension for this project.
At the end of our crochet along, you will have a fun and useful project that you can use right away, rain or shine!
This is a crochet project that an advanced beginner can complete. To complete this project you’ll need to know:
- Basic crochet stitches including chain, single crochet, half double crochet, double crochet, and slip stitch. Get a refresher here.
- Crocheting in the round including increasing. Get a refresher here.
Supplies Needed:
- Approximately 540 yards (494 meters) in main color and approximately 273 yards (250 meters) in each of 2 colors in any light weight yarn – I used 2 skeins in King Cole Cherished DK in 3441 Stonewash and 1 skein each in King Cole Cherished DK in 3440 Pearl and 3439 Mulberry
- US Size F-5/3.75 mm crochet hook, or size needed to obtain gauge
- Yarn needle
- Tools for measuring and cutting
Finding the Right Tension:
- Using single crochet or half double crochet, create a swatch approximately 4” (10 cm) square, starting with a crochet hook 1 size smaller than what you would usually use for light (#3/DK) weight yarn.
- After completing your swatch, look it over. Your stitches should be tight and firm, creating a dense fabric. If your stitches are loose, consider a smaller hook for the final project. If your stitches are too tight to crochet into, consider using a larger hook for the final project.
- You can find out more about crochet hook sizes here.
Crochet Along Schedule:
Week 1: Supply List and Gauge Swatch (you are here)
Week 2: Pattern Part 1
Week 3: Pattern Part 2
Week 4: Pattern Part 3 and Finishing
Week 2: Pattern Part 1
Welcome back to the mystery crochet along. I’m Marie from Underground Crafter and I’m excited to be sharing the first part of this pattern!
Abbreviations Used In This Pattern (US Crochet Terms):
BL – back loop only – This video demonstrates how to find the back loop on your crochet stitches.
CA – Color A
CB – Color B
ch – chain
dc – double crochet
hdc – half double crochet
MC – Main Color
rep – repeat
Rnd(s) – Round(s)
RS – right (front) side
sc – single crochet
sl st – slip stitch
sp – space
st(s) – stitch(es)
[] Repeat instructions within brackets as indicated
* Repeat instructions after asterisks as indicated
() Work stitches between parentheses into same stitch or space
Pattern Notes:
Ch 1 at beginning and sl st at end of rounds do not count as stitches.
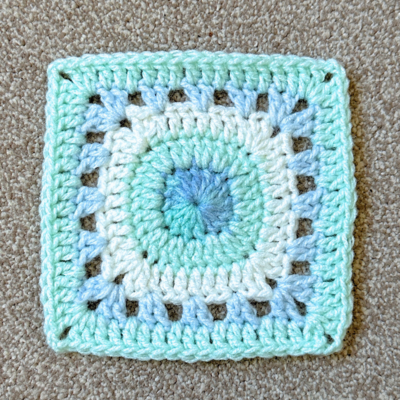
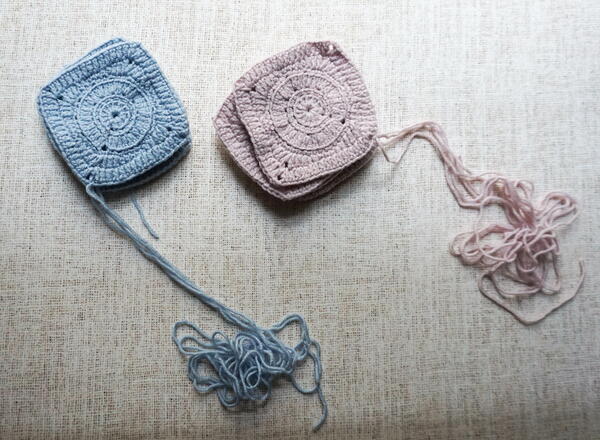
Each completed Motif should measure 4.25” (11 cm) square.
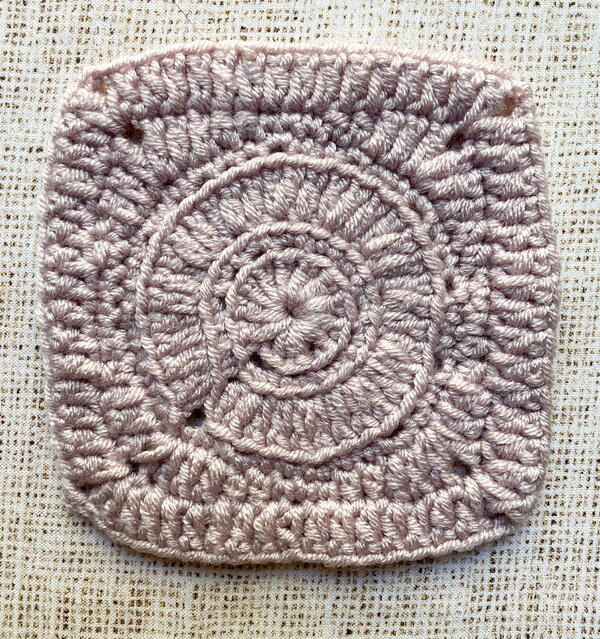
Part 1 Motif A Pattern:
Make 5 with CA and make 4 with MC.
Motif A
Ch 4, skip 3 ch, join with sl st to next ch to form ring.
Rnd 1: (RS) Ch 1, 12 dc in ring, join with sl st to BL of first dc. – 12 sts
Rnd 2: Ch 1, 2 scBL in same st and in each st around, join with sl st to BL of first sc. – 24 sts
Rnd 3: Ch 1, dcBL in same st, 2 dcBL in next st, [dcBL in next st, 2 dcBL in next st] around, join with sl st to BL of first dc. – 36 sts
Rnd 4: Ch 1, scBL in same st and next st, 2 scBL in next st, [scBL in next 2 sts, 2 scBL in next st] around, join with sl st to first sc. – 48 sts
Rnd 5: Ch 1, dc in same st, *dc in next 2 sts, hdc in next 2 sts, sc in next 3 sts, hdc in next 2 sts, dc in next 2 sts,** (dc, ch 2, dc) in next st; rep from * around, ending last rep after **, dc in first st, ch 1, sc (counts as second ch in ch-2 sp) to top of first dc to join. – 13 sts on each side + 4 ch-2 sp.
Rnd 6: Ch 1, dc in same ch-2 sp, *dc in next 13 sts,** (dc, ch 2, dc) in next ch-2 sp, rep from * around, ending last rep after **, dc in first st, ch 2, join with sl st to top of first dc.
Fasten off with long yarn tail (approximately 12”/30.5 cm) for seaming.
Crochet Along Schedule:
Week 1: Supply List and Gauge Swatch
Week 2: Pattern Part 1 (you are here)
Week 3: Pattern Part 2
Week 4: Pattern Part 3 and Finishing
Week 3: Pattern Part 2
Welcome back to the mystery crochet along. I’m Marie from Underground Crafter and I’m excited to be sharing the second part of this pattern!
Abbreviations Used In This Pattern (US Crochet Terms):
BL – back loop only – This video demonstrates how to find the back loop on your crochet stitches.
CA – Color A
CB – Color B
ch – chain
dc – double crochet
hdc – half double crochet
MC – Main Color
rep – repeat
Rnd(s) – Round(s)
RS – right (front) side
sc – single crochet
sl st – slip stitch
sp – space
st(s) – stitch(es)
[] Repeat instructions within brackets as indicated
* Repeat instructions after asterisks as indicated
() Work stitches between parentheses into same stitch or space
Pattern Notes:
Ch 1 at beginning and sl st at end of rounds do not count as stitches.
Each completed Motif should measure 4.25” (11 cm) square.
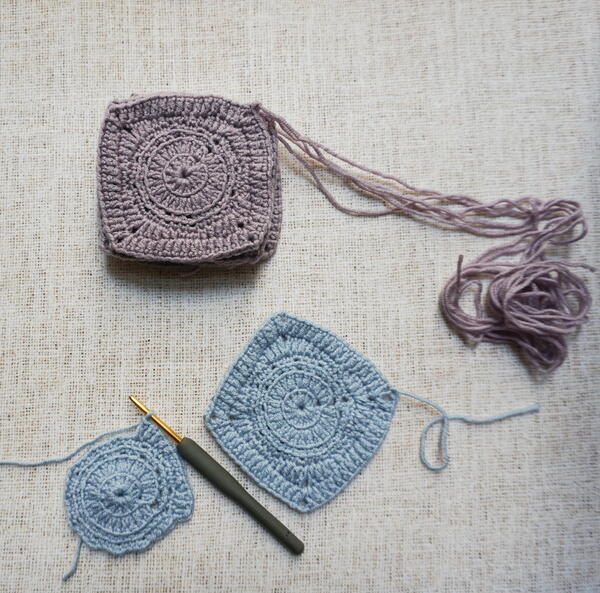
Part 1 Motif B Pattern:
Make 5 with CB and make 4 with MC.
Motif B
Ch 4, skip 3 ch, join with sl st to next ch to form ring.
Rnd 1: (RS) Ch 1, 12 dc in ring, join with sl st to BL of first dc. – 12 sts
Rnd 2: Ch 1, 2 dcBL in same st and in each st around, join with sl st to BL of first dc. – 24 sts
Rnd 3: Ch 1, scBL in same st, 2 scBL in next st, [scBL in next st, 2 scBL in next st] around, join with sl st to BL of first sc. – 36 sts
Rnd 4: Ch 1, scBL in same st and next st, 2 scBL in next st, [scBL in next 2 sts, 2 scBL in next st] around, join with sl st to first sc. – 48 sts
Rnd 5: Ch 1, dc in same st, *dc in next 2 sts, hdc in next 2 sts, sc in next 3 sts, hdc in next 2 sts, dc in next 2 sts,** (dc, ch 2, dc) in next st; rep from * around, ending last rep after **, dc in first st, ch 1, sc (counts as second ch in ch-2 sp) to top of first dc to join. – 13 sts on each side + 4 ch-2 sp
Rnd 6: Ch 1, dc in same ch-2 sp, *dc in next 13 sts,** (dc, ch 2, dc) in next ch-2 sp, rep from * around, ending last rep after **, dc in first st, ch 2, join with sl st to top of first dc.
Fasten off with long yarn tail (approximately 12”/30.5 cm) for seaming.
Crochet Along Schedule:
Week 1: Supply List and Gauge Swatch
Week 2: Pattern Part 1
Week 3: Pattern Part 2 (you are here)
Week 4: Pattern Part 3 and Finishing
Week 4: Pattern Part 3 and Finishing
I’m Marie from Underground Crafter and here is the final clue for our crochet along!
Abbreviations Used In This Pattern (US Crochet Terms):
BL – back loop only – This video demonstrates how to find the back loop on your crochet stitches.
CA – Color A
CB – Color B
ch – chain
dc – double crochet
hdc – half double crochet
MC – Main Color
rep – repeat
Rnd(s) – Round(s)
RS – right (front) side
sc – single crochet
sl st – slip stitch
sp – space
st(s) – stitch(es)
WS – wrong (back) side
[] Repeat instructions within brackets as indicated
* Repeat instructions after asterisks as indicated
+ Repeat instructions after plus sign as indicated
() Work stitches between parentheses into same stitch or space
Pattern Notes:
Ch 1 at beginning and sl st at end of rounds do not count as stitches.
Part 3 Instructions:
Rectangles (Make 2)
Starting with long yarn tail (approximately 18”/45.5 cm) for seaming, with MC, ch 6.
Row 1: Turn, skip 1 ch, hdc in next 5 sts. – 5 sts
Row 2: Turn, ch 1, hdc in first 5 sts.
Rep Row 2 until rectangle measures approximately 24” (61 cm) long. Fasten off with long yarn tail (approximately 18”/45.5 cm) for seaming.
Note: It is more important for the rectangles to be the same length as each other than it is for them to be a specific length.
Assemble Panels
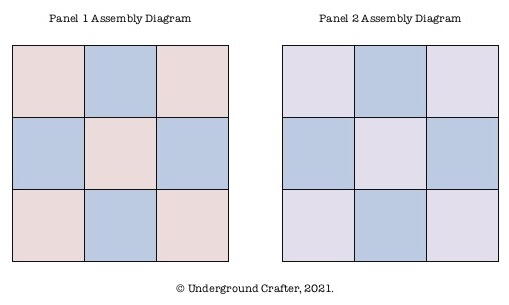
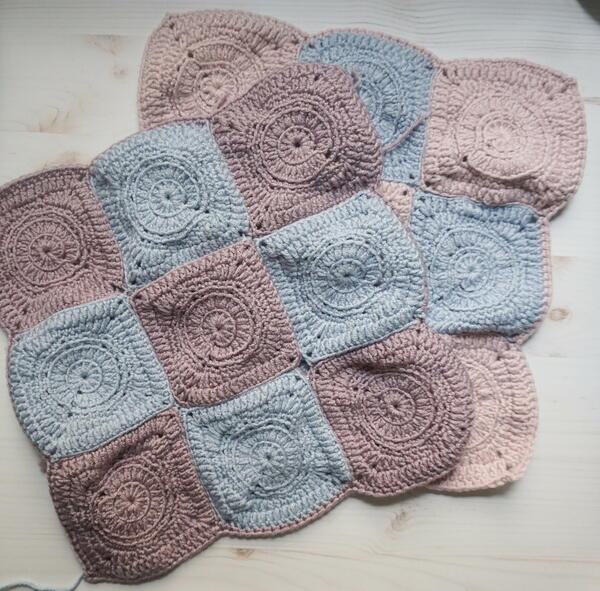
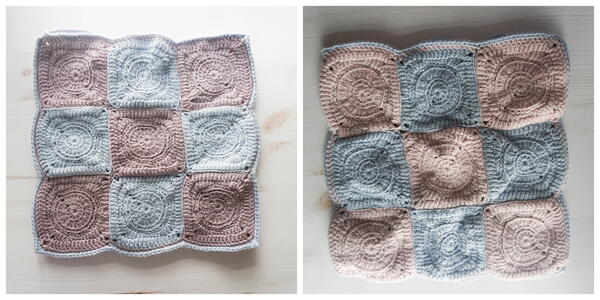
Join squares together to create 2 panels following the assembling diagram below.
Using Motif A in CA and MC, join with slip stitch seam (video and photo tutorials are available here) on wrong sides using long yarn tails for seaming. First, join squares in rows; then join rows.
Using Motif B in CB and MC, join with slip stitch seam (video and photo tutorials are available here) on wrong sides using long yarn tails for seaming.
First, join squares in rows; then join rows.
Weave in yarn tails on wrong side with yarn needle.
Finish Panels
Note: For the Panel using Motif A squares in CA and MC, use CA. For the Panel using Motif B squares in CB and MC, use CB.
With RS facing, join yarn with sl st to any corner ch-2 sp.
Border Rnd: Ch 1, *sc in ch-2 sp, [+sc in next 15 sts, sc in ch-sp on same square,++ sc in ch-sp on next square] twice, rep from + to ++ once, ch 2, turn to work along next side; rep from * 3 more times, ch 2, join with sl st to top of first sc. Fasten off.
Assemble Panels
With WS of panels together and RS facing, join MC with sl st to any corner ch-2 sp, working through both layers. Working along 3 edges and through both layers, join with single crochet seam (tutorial available here) as follows:
Joining Rnd: Ch 1, sc in ch-2 sp, [sc in next 51 sts, (sc, ch 2, sc) in next ch-2 sp, turn to work along next edge] 3 times. Do not fasten off.
Do not seam next edge. Work on one side at a time.
Next Row: Sc in next 51 sts along edge, sc in next 51 sts on next edge, join with sl st to sc in ch-2 sp. Fasten off MC.
Attach Rectangles
Using locking stitch markers or pins, position rectangles on assembled panels as follows. Position rectangle so that first short edge is just outside of center square on one side of the open panel.
Being careful not to twist rectangle, position other short edge to just outside of the opposite side of the center square on the same side of the open panel. Repeat with other rectangle on other side of the open panel, following photo below.
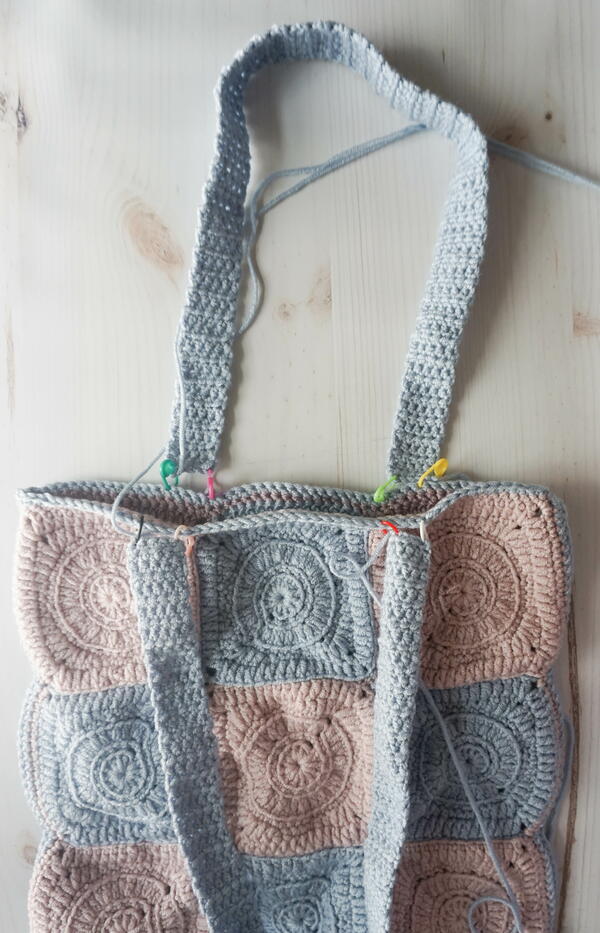
Using long yarn tail and working on WS of panel, seam short edges of each rectangle to panels with single crochet.
Fasten off. Weave in yarn tails on WS.
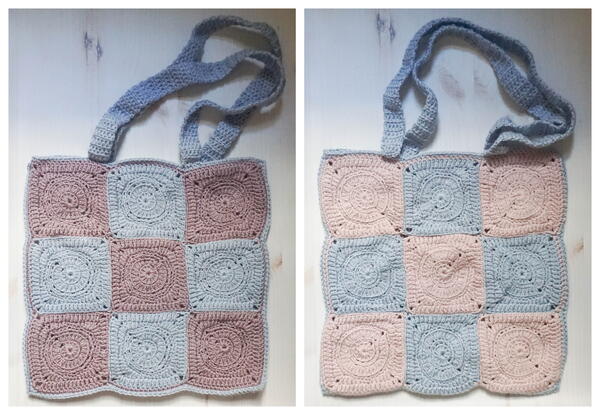
Have you figured out what the project is yet? It’s a reversible granny square tote bag!
The finished measurements for my project were approximately 13” (33 cm) square before adding the straps.
If you’d like to line your bag, you can find a helpful tutorial for lining crochet bags here.
Crochet Along Schedule:
Week 1: Supply List and Gauge Swatch
Week 2: Pattern Part 1
Week 3: Pattern Part 2
Week 4: Pattern Part 3 and Finishing (you are here)
We hope you enjoyed this crochet along! See you next time...
Share your progress with us in the comments down below!
Read Next2770+ Free Crochet Patterns
Your Recently Viewed Projects
KLC
Apr 30, 2021
The CAL will start on 5/5 but the supply list has been included on the page above. The rest of the information for the first week will be added when the CAL starts. Thanks! - Krista, Editor, AllFreeCrochet
Report Inappropriate Comment
Are you sure you would like to report this comment? It will be flagged for our moderators to take action.
Thank you for taking the time to improve the content on our site.

