Happy Halloween Crochet Cuff
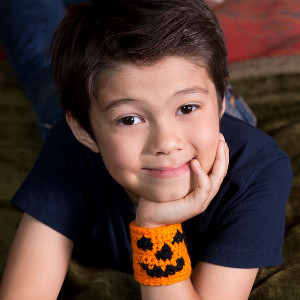
This Happy Halloween Crochet Cuff is such a cute way for your kids to celebrate Halloween this year. This crochet cuff features the face of a jack o' lantern to give it a design that is sure to make everyone smile. It's super easy to work up and change colors, too, so you could even make it have whatever face you want. Cuff bracelets are definitely an overlooked accessory, but I bet the kids at school will be jealous of this cool Halloween crochet accessory.

Crochet HookG/6 or 4 mm hook
Yarn Weight(4) Medium Weight/Worsted Weight and Aran (16-20 stitches to 4 inches)
MATERIALS:
- Red Heart Super Saver:
- A: 254 Pumpkin (1 skein)
- B: 312 Black (1 skein)
- Susan Bates Crochet Hook (G/6, 4 mm)
- Yarn Needle
- Two 1/2" - 3/4" (12-15 mm) buttons
SIZE:
Cuff measures 6” (15 cm) long and 2½” (6.5 cm) wide.
GAUGE:
16 sts = 4” (10 cm); 14 rows = 4” (10 cm) in single crochet
SPECIAL STITCHES:
sc2tog = [Draw up a loop in next st] twice, yarn over and draw through all 3 loops on hook.
sc3tog = [Draw up a loop in next st] 3 times, yarn over and draw through all 3 loops on hook.
NOTES:
1. Work tightly for a firm cuff.
2. To change color, work last stitch of old color to last yarn over. Yarn over with new color and draw through all loops on hook to complete stitch. Drop old color to the wrong side. Proceed with new color. Do not cut old color. Carry old color evenly across wrong side of work when next needed.
3. Decreases, increases, and color changes are used to create the pumpkin face. Each row has the same number of decreases and increases, so the stitch count remains the same throughout.
CUFF
With A, ch 24.
Row 1 (right side): Sc in 2nd ch from hook and in each ch across—23 sc.
Row 2: Ch 1, turn, with A, sc in first 7 sc, sc2tog; with B, 2 sc in next sc, sc in next 3 sc, 2 sc in next sc; with A, sc2tog, sc in last 7 sc.
Row 3: Ch 1, turn, with A, sc in first 6 sc, sc2tog; with B, 2 sc in next sc; [with A, sc in next sc; with B, sc in next sc] twice, with A, sc in next sc; with B, 2 sc in next sc; with A, sc2tog, sc in last 6 sc.
Row 4: Ch 1, turn, with A, sc in each sc across.
Row 5: Ch 1, turn, with A, sc in first 10 sc; with B, sc in next 3 sc; with A, sc in last 10 sc.
Row 6: Ch 1, turn, with A, sc in first 9 sc, 2 sc in next sc; with B, sc3tog; with A, 2 sc in next sc, sc in last 9 sc.
Row 7: Ch 1, turn, with A, sc in first 7 sc; with B, sc in next 3 sc; with A, sc in next 3 sc; with B, sc in next 3 sc; with A, sc in last 7 sc
Row 8: Ch 1, turn, with A, sc in first 6 sc, 2 sc in next sc; with B, sc3tog; with A, 2 sc in next sc, sc in next sc, 2 sc in next sc; with B, sc3tog; with A, 2 sc in next sc, sc in last 6 sc.
Row 9: Ch 1, turn, with A, sc in each sc across.
Button Loops and Edging:
Working in ends of rows down side of piece, sc in end of Row 9, [ch 3, skip ends of next 3 rows, sc in end of next row] twice, slip st evenly spaced across lower edge of piece, side edge, and in all sts of Row 9; join with slip st in first sc. Fasten off.
FINISHING
Sew buttons opposite button loops. Weave in ends.
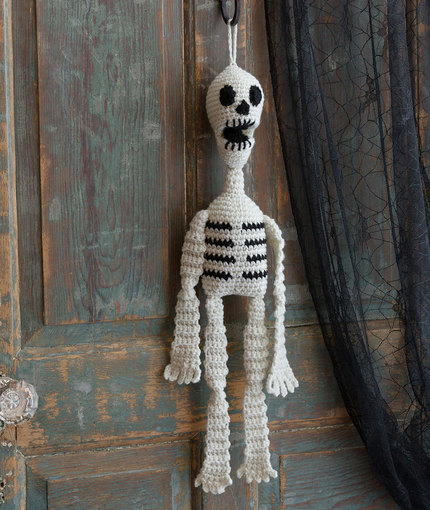
Read NextHanging Crochet Skeleton
Your Recently Viewed Projects
JaneEK
Aug 30, 2017
Im so glad to see a little boy modeling this cuff. Although you certainly could make a little girl version in pink, theres certainly nothing specifically feminine about this project. Ill make up a sample this evening, and maybe a few more as monsters and aliens. Its so hard to find things to crochet for boys, and I hate for my grandsons to be left out when it comes to Grandma Goodies.
Report Inappropriate Comment
Are you sure you would like to report this comment? It will be flagged for our moderators to take action.
Thank you for taking the time to improve the content on our site.

