Glowing Embers Crochet Basket
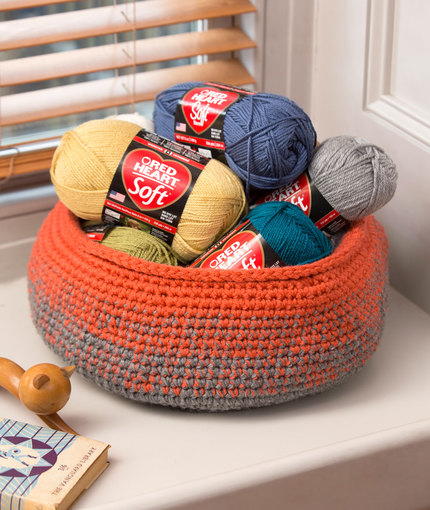
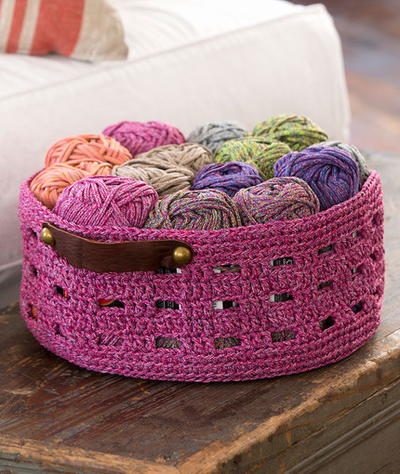
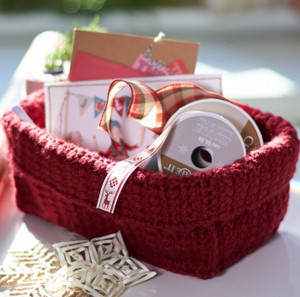
Using two hues of Red Heart's Super Saver yarn, you can create a shaded and modern look as you work up your Glowing Embers crochet basket. Use this crochet basket to keep your yarn stash organized or for any other smaller household items.
NotesNotes:
1. Basket is made in continuous rounds
(spiral) with right side facing. Do not join
rounds until instructed.
2. Wind each skein into 3 balls of equal size
before beginning. Hold 3 strands of yarn
together throughout.
3. Place marker for beginning of round
and move marker up as each round is
completed.
4. Changing one strand of color as instructed
creates ember motif. Drop and cut
indicated strand at end of round; pick
up new color and hold with remaining 2
strands.

Crochet HookL/11 or 8 mm hook
Yarn Weight(4) Medium Weight/Worsted Weight and Aran (16-20 stitches to 4 inches)
Crochet GaugeRounds 1-5 = 4 1/4" (11 cm)
Finished Size 7½” (19 cm) high x 13½” (34.5 cm) diameter across bottom
Materials List
- RED HEART® Super Saver®: 2 skeins 400 Gray Heather A and 1 skein 726 Coral B
- US size L/11 (8.0 mm) hooks
- Yarn needle, stitch marker
Pattern
Basket
-
With 3 strands of A held together, ch 2.
-
Round 1: Work 6 sc in 2nd ch from hook—6 sc. Do not join; place marker for beginning of round and move marker up as each round is completed.
-
Round 2: Work 2 sc in each sc around—12 sc.
-
Round 3: *Sc in next sc, 2 sc in next sc; repeat from * around—18 sc.
-
Round 4: *Sc in next 2 sc, 2 sc in next sc; repeat from * around—24 sc.
-
Round 5: *Sc in next 3 sc, 2 sc in next st; repeat from * around—30 sc.
-
Round 6: *Sc in next 2 sc, 2 sc in next sc; repeat from * around—40 sc.
-
Round 7: *Sc in next 4 sc, 2 sc in next sc; repeat from * around—48 sc.
-
Round 8: *Sc in next 5 sc, 2 sc in next sc; repeat from * around—56 sc.
-
Round 9: *Sc in next 6 sc, 2 sc in next sc; repeat from * around—64 sc.
-
Round 10: *Sc in next 7 sc, 2 sc in next sc; repeat from * around—72 sc.
-
Round 11: *Sc in next 8 sc, 2 sc in next sc; repeat from * around—80 sc.
-
Round 12: *Sc in next 9 sc, 2 sc in next sc; repeat from * around—88 sc.
-
Round 13: *Sc in next 10 sc, 2 sc in next sc; repeat from * around—96 sc.
-
Round 14: *Sc in next 11 sc, 2 sc in next sc; repeat from * around—104 sc.
-
Round 15: [Sc in next 12 sc, 2 sc in next sc] 8 times, remove marker, sc in next 6 sc, slip st in next sc
-
Round 16: Working in back loops only, sc in next 112 sc—112 sc. Place marker for beginning of round and move marker up as each round is completed.
-
Rounds 17–19: Working in both loops, sc in each sc around; drop and cut 1 strand of A at end of Round 19, leaving an 8” (20.5 cm) tail. Pick up 1 strand of B.
-
Round 20: With 2 strands of A and 1 strand of B held together, sc in each sc around.
-
Round 21: *Sc in next 26 sc, sc2tog; repeat from * around—108 sc.
-
Rounds 22 and 23: Sc in each sc around; drop and cut 1 strand of A at end of Round 23, leaving an 8” (20.5 cm) tail. Pick up 1 strand of B.
-
Round 24: With 1 strand of A and 2 strands of B held together, sc in each sc around.
-
Round 25: *Sc in next 25 sc, sc2tog; repeat from * around—104 sc.
-
Rounds 26 and 27: Repeat Rounds 22 and 23.
-
Round 28: With 3 strands of B held together, sc in each sc around.
-
Round 29: *Sc in next 24 sc, sc2tog; repeat from * around—100 sc.
-
Rounds 30 and 31: Sc in each sc around.
-
Round 32: Slip st in each sc around.
-
Round 33: Working in front loops only, slip st in each slip st around.
-
Round 34: Working in both loops, slip st in each slip st around; join with slip st in first slip st. Fasten off.
Finishing
Round 1: With right side facing and holding 3 strands together, join A with slip st in any unworked loop of Round 16, slip st in each unworked loop around; join with slip st in first slip st. Fasten off.
Weave in ends.
Read NextSimple Stash Basket
Your Recently Viewed Projects
jerimoulder 703143 3
Aug 24, 2018
Your pattern says to finish with a slip stitch row of Color A. But the photo shows the top edge as color B. Is there a reason?
JaneEK
May 05, 2018
Ive worked with two strands together, but this project calls for handling three. Its interesting how the designer instructs you to periodically cut one of the yarn strands to make the ember pattern. Its not a hard pattern to follow but it is fiddly. And definitely use the stitch markers on this one! The original free download can be found here http//www.redheart.com/free-patterns/glowing-ember == s-basket
mmrb3618686
Nov 10, 2017
This is a great craft pattern to make to hold a variety of different small items such as threads, candles, cat toys and even coupons.
princess6860504
Mar 15, 2017
I love this basket design! I love the colorway, too. I appreciate that we have the pattern right on this page instead of a separate link. It looks like it holds quite a bit of stuff! These would be great for holding babies toys, stuffed animals and blankets. There are several color combinations to make this in.
shine1313 8641653
Nov 05, 2016
I made this as a birthday gift for my sister. She loves it and it has found a very practical use, holding her yarn! Looks fantastic!
Inukshuk84
Jun 16, 2016
These baskets are infinitely versatile. They would not look out of place in your craft room, filled with yarn or thread bobbins. How sweet would they look in a child's room, customized to the decor, filled with little toy cars or blocks? They wouldn't look amiss even on your kitchen table, lined with a cloth napkin for your bread! What about filling it with goodies as a welcome gift for a new neighbour?
rockmist 2361393
Jun 16, 2016
not made because there is no pic....wouldn't even know what it's supposed to look like
AFC Editor Julia
Jun 17, 2016
Hi there, There are photos added for every project - there might have been a temporary loading issue preventing this one from showing, but it's there! The image URL, if you need it, is http://d2droglu4qf8st.cloudfront.net/2016/05/282479/Glowing-Embers-Crochet-Basket_Large500_ID-1676035.jpg?v=1676035 Thanks! Julia, editor for AllFreeCrochet
Report Inappropriate Comment
Are you sure you would like to report this comment? It will be flagged for our moderators to take action.
Thank you for taking the time to improve the content on our site.

