Snazzy Crochet Costume Top Hat
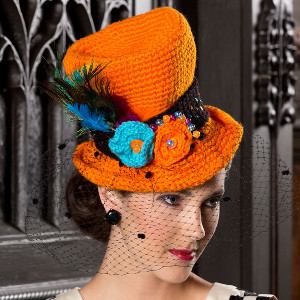
Let your creativity run wild with this Snazzy Crochet Costume Top Hat. It can be decked out in anything you wish or you can follow the flowers, netting, and sequins that can be seen in this pattern from Red Heart Yarns. You will look as though you stepped straight out of an old Hollywood movie, making this Halloween crochet pattern the perfect homemade costume. Take the kids trick-or-treating or sit on your doorstep in this seriously stylish and creative Halloween costume hat.

Crochet HookH/8 or 5 mm hook, I/9 or 5.5 mm hook
Yarn Weight(4) Medium Weight/Worsted Weight and Aran (16-20 stitches to 4 inches)
MATERIALS:
- Red Heart Super Saver:
- A: 254 Pumpkin (2 skeins)
- B: 312 Black (1 skein)
- C: 512 Turqua (1 skein)
- Susan Bates Crochet Hooks (H/8, 5 mm) and (I/9, 5.5 mm)
- Yarn Needle
- Sewing Needle
- Black Sewing Thread
- Straight Pins
- Black Netting (18" x 8", 45.5 x 20.5 cm)
- 2 1/2" (12.5 mm) Buttons (for flowers)
- 1 Package Medium Size Beads (sample used Clubhouse Crafts Bright Bubble Bead Mix)
- 1 Packabe Sequins (sample used Mixed Sequins by Advantus Corp, 9 color pack)
- 1 Package Craft Feathers (sample used Assorted Feather by ZFP Company)
SIZE:
Hat measures 7” (18 cm) tall and 10” wide (18 x 5.5 cm)
GAUGE:
12 sts = 4” (10cm) in pattern; 12 rows = 4” (10cm)
SPECIAL STITCHES:
sc2tog = [Insert hook in next stitch, yarn over and pull up a loop] twice, yarn over and draw through all 3 loops on hook.
NOTES:
1. Hat is worked in continuous rounds with right side facing at all times.
2. Place marker for beginning of round and move marker up as each round is completed.
HAT
Crown and Sides
With 2 strands of A held together and larger hook, ch 4; join with slip st in first ch to form a ring.
Round 1: Work 8 sc into ring—8 sc.
Round 2: Work 2 sc in each st—16 sc.
Round 3: [Sc in next st, 2 sc in next st] 8 times—24 sc.
Round 4: [Sc in next 2 st, 2 sc in next st] 8 times—32 sc.
Round 5: [Sc in next 3 st, 2 sc in next st] 8 times—40 sc.
Round 6: Sc in each st.
Round 7: [Sc in next 4 st, 2 sc in next st] 8 times—48 sc.
Round 8: Sc in each st.
Round 9: [Sc in next 5 st, 2 sc in next st] 8 times—56 sc.
Round 10: [Sc in next 6 st, 2 sc in next st] 8 times—64 sc.
Round 11: Sc in each st.
Round 12: [Sc in next 7 st, 2 sc in next st] 8 times—72 sc.
Rounds 13-16: Sc in each st.
Round 17: [Sc in next 7 st, sc2tog] 8 times—64 sc.
Rounds 18 and 19: Sc in each st.
Round 20: [Sc in next 6 st, sc2tog] 8 times—56 sc.
Rounds 21-32: Sc in each st. Do not fasten off.
Brim
Round 33: [Sc in next 6 st, 2 sc in next st] 8 times—64 sc.
Round 34: Sc in each st.
Round 35: [Sc in next 7 st, 2 sc in next st] 8 times—72 sc.
Round 36: Sc in each st.
Round 37: [Sc in next 8 st, 2 sc in next st] 8 times—80 sc.
Round 38: Sc in each st.
Round 39: [Sc in next 9 st, 2 sc in next st] 8 times—88 sc.
Round 40: Sc in each st. Fasten off.
Hat Band
With larger hook and B, ch 9.
Row 1: Sc in 2nd ch from hook and in ch, turn—8 sc.
Row 2: Ch 1, sc in each st, turn.Repeat Row 2 until hat band fits around the base of the top hat. Fasten off, leaving tail for sewing.
FLOWERS
Large Flower
With smaller hook and C, ch 25.
Row 1: Work 3 dc in 2nd ch from hook and in each ch across. Fasten off.
Small Flower
With smaller hook and A, ch 17.
Row 1: Work 3 dc in 2nd ch from hook and in each ch across. Fasten off.
Loosely roll each row around in a spiral to form flower. Sew a button and bead in the center of each flower through all layers to hold its shape.
FINISHING
Hat band
With black thread and sewing needle, sew three rows of sequins down the center of the hat band. With ending tail threaded through yarn needle and wrong sides held together, sew the hat band seam. Slip the hat band onto the hat; sew in place. Pin flowers and feathers in desired positions and sew onto the hat band. Sew beads around the flowers.
Netting
With double thickness of black thread, baste across one long edge of the netting. Gently gather the netting by pulling the thread until it fits across the front of hat. Sew the netting under the hat band.
Brim
Roll up the sides of the brim up and pull the front and the back of the brim down for a more stylish appearance. With A, tack brim in place if desired.
Weave in all ends.
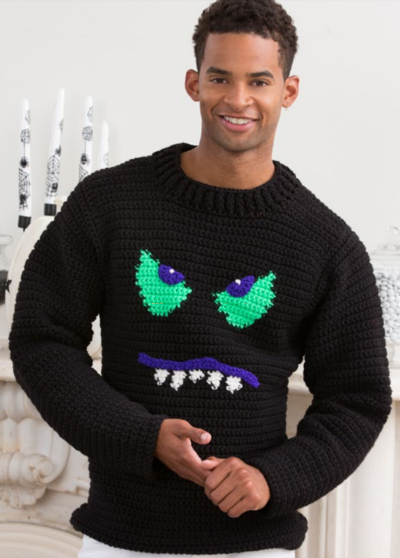
Read NextMonster Face Crochet Sweater

