Seriously Striped Crochet Beanie
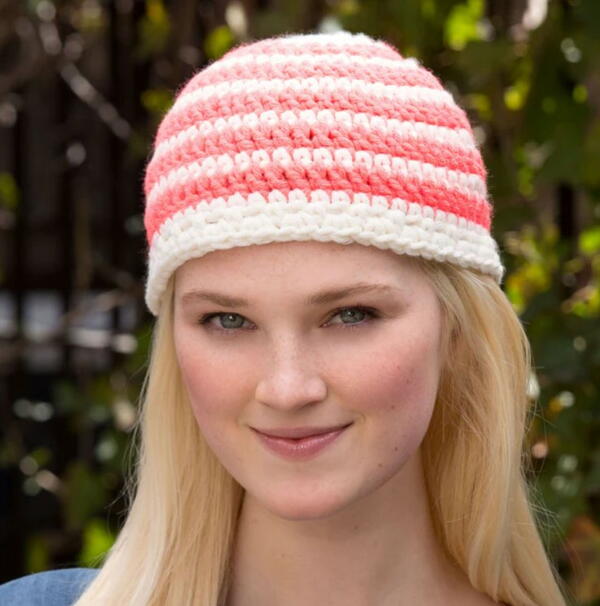
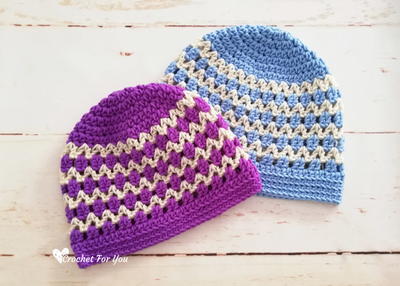
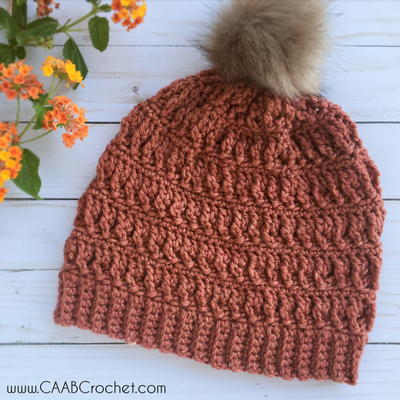
Winter just got more fun with this Seriously Striped Crochet Beanie. Work up different colors for each member of the family or for all your friends! Everyone is sure to love this striped crochet beanie pattern that is simple, fun, and easy. Bulky yarn makes it fast to work up, so you are sure to have a whole load of them before winter even hits. With a 22" circumference, this crochet beanie pattern will fit perfectly.

Crochet HookK/10.5 or 6.5 mm hook
Yarn Weight(5) Bulky/Chunky (12-15 stitches for 4 inches)
MATERIALS:
- Red Heart Heads Up, 1 ball each:
- A: 100 Ivory
- B: 275 Bright Coral
- Susan Bates Crochet Hook: 6.5mm [K-10 1/2 US]
- Yarn Needle
SIZE:
Hat measures about 22" (56 cm) circumference
GAUGE:
Rounds 1-4 = 4" (10 cm) diameter
NOTES:
1. To make a smaller hat, use a hook one size smaller. To make a larger hat, use a hook one size larger.
2. Hat is worked in joined rounds, beginning at top of hat. Join but do not turn rounds.
3. Hat stripes are worked in the following color sequence: 3 rounds with A, 1 round with B, [1 round with A, 1 round with B] 4 times, 3 rounds with A.
4. To change color, fasten off old color and join new color in indicated stitch as instructed. The new color is joined in different stitches to help hide the joins.
Special Stitches:
beg-dc (beginning double crochet) = Beginning with empty hook and leaving a long beginning tail to weave n later, [yarn over] twice, insert hook in indicated stitch, yarn over and pull up a loop, [yarn over and draw through 2 loops on hook] twice. Note: If preferred, a traditional beginning double crochet can be worked as follows: Join yarn with slip st in indicated stitch, ch 3.
BEANIE
With A, ch 4; join with slip st in first ch to form a ring.
Round 1 (right side): Work 8 sc in ring; join with slip st in first sc—8 sc.
Notes: Work first stitch of each round in same stitch as joining slip stitch unless otherwise instructed.
Round 2: Ch 1, 2 sc in each sc around; join with slip st in first sc—16 sc.
Round 3: Ch 1, [sc in next st, 2 sc in next st] 8 times; join with slip st first sc—24 sc. Fasten off A.With A, ch 4; join with slip st in first ch to form a ring.
Round 4: With right side facing, join B with beg-dc in 13th sc of previous round, dc in same st, dc in next 2 sts, [2 dc in next st, dc in next 2 sts] 7 times; join with slip st in beg-dc—32 dc. Fasten off B.
Round 5: With right side facing, draw up a loop of A in 17th dc of previous round, ch 1, [2 sc in next st, sc in next 3 sts] 8 times; join with slip st in first sc—40 sc. Fasten off A.
Round 6: With right side facing, join B with beg-dc in 21st sc of previous round, dc in same st, dc in next 4 sts, [2 dc in next st, dc in next 4 sts] 7 times; join with slip st in beg-dc—48 dc. Fasten off B.
Round 7: With right side facing, draw up a loop of A in 25th dc of previous round, ch 1, [2 sc in next st, sc in next 5 sts] 8 times; join with slip st in first sc—56 sc. Fasten off A.
Round 8: With right side facing, join B with beg-dc in 29th sc of previous round, dc in each st around; join with slip st in beg-dc. Fasten off B.
Round 9: With right side facing, draw up a loop of A in 29th dc of previous round, ch 1, sc in each st around; join with slip st in first sc. Fasten off A.
Rounds 10 and 11: Repeat Rounds 8 and 9.
Round 12: Repeat Round 8.
Round 13: With right side facing, draw up a loop of A with beg-dc in same st as joining, ch 1, sc in each st around; join with slip st in first sc.
Round 14: Ch 1, sc in same st as joining, *ch 1, skip next st, sc in next st; repeat from * around to last st, ch 1, skip next st; join with slip st in first sc—28 ch-1 spaces and 28 sc.
Round 15: Ch 1, skipping the sc sts, work 2 sc in each ch-1 space around; join with slip st in first sc—56 sc. Fasten off A.
FINISHING
Weave in ends.
Read NextEnglish Garden Sun Hat
Your Recently Viewed Projects
marylbrooks64
Feb 25, 2023
Where's the rest of the directions? It just keeps telling you the starting three rows
JaneEK
Oct 12, 2018
This is a delightfully basic Beanie that thoroughly deserves the Easy label. Since its a Red Heart Yarns project, I was hoping to find the original at the website. Unfortunately, it doesnt seem to be there any more. The good news is that this is such an easy project to work up that you could make several just while watching TV.
Report Inappropriate Comment
Are you sure you would like to report this comment? It will be flagged for our moderators to take action.
Thank you for taking the time to improve the content on our site.


