Team USA Crochet Mittens
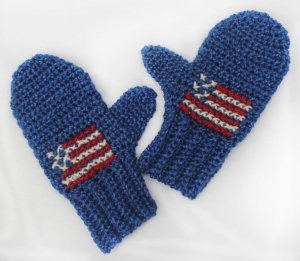
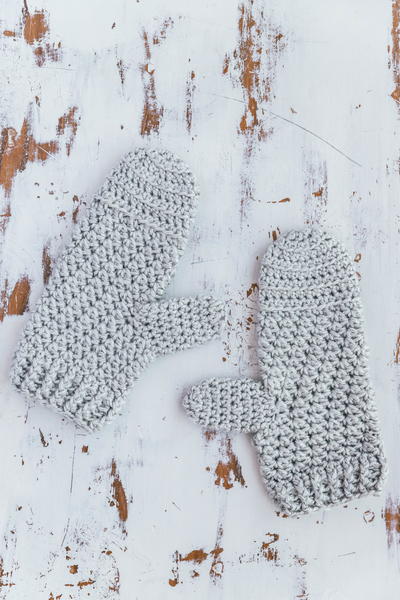
Cheer on your favorite team with these Team USA Crochet Mittens by Lion Brand Yarns. Worked up in Heartland yarn (Olympic, Acadia, and Redwood), this easy crochet pattern includes instructions on how to crochet a pair for everyone in your family. Instructions for both child and adult sizes are available to choose from. Keep your hands warm and toasty this winter while showing off your American spirit. It's a fun crochet pattern to wear during the winter Olympic Games.

Crochet HookI/9 or 5.5 mm hook, J/10 or 6 mm hook
Yarn Weight(4) Medium Weight/Worsted Weight and Aran (16-20 stitches to 4 inches)
MATERIALS
-
Lion Brand Heartland Yarn, 1 skein of each:
136-109 Heartland Yarn: Olympic (A)
136-098 Heartland Yarn: Acadia (B)
136-113 Heartland Yarn: Redwood (C) - Lion Brand Crochet Hook - Size I-9
- Lion Brand Crochet Hook - Size J-10 (6 mm)
- Lion Brand Large-Eye Blunt Needles (Set of 6)
- Chart
SIZE
Child (Multiple Sizes), Small, Medium
Child 24 months, (Child 3-7, Adult Medium, Adult Large)
Finished Circumference: 5 1/4 (7, 9, 8 1/4) in. (13.5 (18, 23, 25.5) cm)
Finished Length: 6 (8 1/4, 10 1/4, 11 1/2) in. (15 (21, 26, 29) cm)
Note: Pattern is written for smallest size with changes for larger sizes in parentheses. When only one number is given, it applies to all sizes. To follow pattern more easily, circle all numbers pertaining to your size before beginning.
GAUGE
12 sc + 12 rows = 4 in. (10 cm) with larger hook.
BE SURE TO CHECK YOUR GAUGE. When you match the gauge in a pattern, your project will be the size specified in the pattern and the materials specified in the pattern will be sufficient. If it takes you fewer stitches and rows to make a 4 in. [10 cm] square, try using a smaller size hook or needles; if more stitches and rows, try a larger size hook or needles.
INSTRUCTIONS
Stitch Explanation: sc2tog (sc 2 sts together) (Insert hook in next st and draw up a loop) twice, yarn over and draw through all 3 loops on hook – 1 st decreased.
MITTENS (make 2)
Cuff
With smaller hook and leaving a long yarn tail for sewing, ch 8 (10, 12, 13). Sc in 2nd ch from hook and in each ch across - 7 (9, 11, 12) sts.
Next Row: Ch 1, turn, sc in back loop of each sc across.
Rep last row 11 (15, 19, 23) more times.
Body Ch 1, turn to work across top of ribbing.
Work 13 (17, 21, 25) sc evenly spaced across.
Next Row (WS): Ch 1, turn, sc in next 1 (1, 2, 3) sts, *2 sc in next st, sc in next 3 (3, 2, 3) sts; rep from * to last 0 (0, 1, 2) sts, sc in last 0 (0, 1, 2) sts - 16 (21, 27, 30) sts.
Row 1: Ch 1, turn, sc in each st across.
Rep last row 5 (9, 14, 16) more times.
Top Shaping
Child 3-7 and Adult Medium Sizes ONLY
Next Row: Ch 1, turn, sc2tog, sc in each of next 7 (10) sts, sc2tog, sc in each of next 8 (11) sts, sc2tog - 18 (24) sts.
All Sizes
Next Row: Ch 1, turn, *sc2tog, sc in each of next 4 (5, 8, 11) sts, sc2tog; rep from * once - 12 (14, 20, 26) sts.
Next Row: Ch 1, turn, sc in each sc across.
Adult Large Size ONLY
Next Row: Ch 1, turn, (sc2tog, sc in each of next 9 sts, sc2tog) twice - 22 sts.
All Sizes
Next Row: Ch 1, turn, sc in each sc across.
Next Row: Ch 1, turn, sc2tog across - 6 (7, 10, 11) sts.
Next Row: Ch 1, turn, sc in each st across.
Fasten off, leaving a long yarn tail.
Thumb
Note: Thumb is worked in continuous rnds, do not turn at ends of rnds.
With RS facing and larger hook, join yarn with a sl st between 2nd and 3rd rows on one side edge above ribbing. Ch 1, sc in end of 3rd row and in each of next 3 (5, 6, 7) rows above ribbing.
Working in the opposite direction (towards cuff) across opposite side of Mitten, sc in ends of same 4 (6, 7, 8) rows - 8 (12, 14, 16) sts.
Rnd 1: Sc in next 6 (10, 12, 14) sts, sc2tog - 7 (11, 13, 15) sts.
Rnd 2: Sc in 5 (9, 11, 13) sts, sc2tog - 6 (10, 12, 14) sts.
Work even in sc to 0 (1/2, 1/2, 1/2) in. (0 (1.5, 1.5, 1.5) cm) before desired length.
Child 3-7, Adult Medium and Adult Large Sizes ONLY
Next Rnd: Sc2tog around - 5 (6, 7) sts.
Work 1 more rnd even in sc.
All Sizes
Fasten off leaving a long yarn tail. Thread yarn tail through rem sts around top of thumb and pull to gather. Knot to secure. Weave in ends.
FINISHING
Embroidery
With B and C and following chart, embroider a flag, centered, on back of each Mitten just below cuff. To embroider, work a cross stitch over each sc.
Thread yarn tail through rem sts around top of Mitten and pull to gather. Knot to secure. Using yarn tails, sew sides to complete mitten.
Weave in ends.

