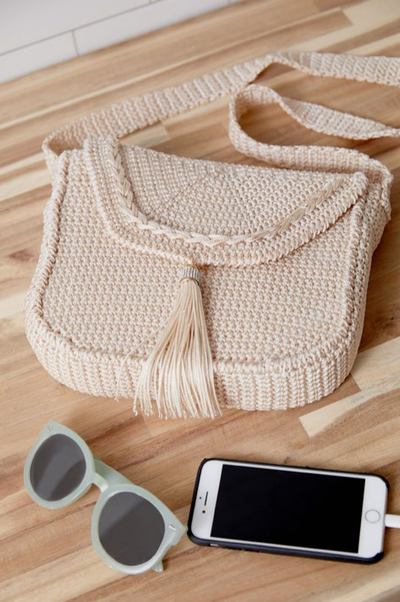
Groovy Berry Crochet Messenger Bag Pattern
Check out this free crochet pattern for a messenger bag you're going to love! It's also worked in parts, so it's easy to follow.
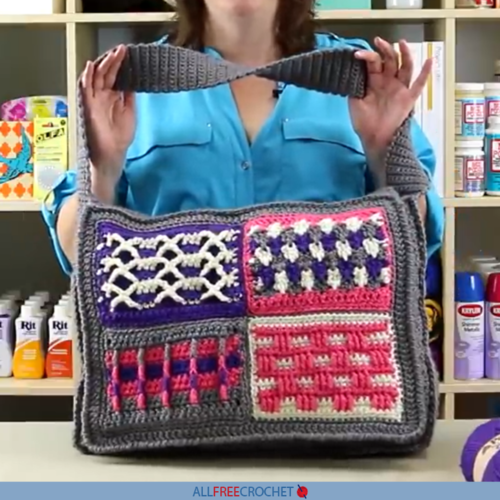
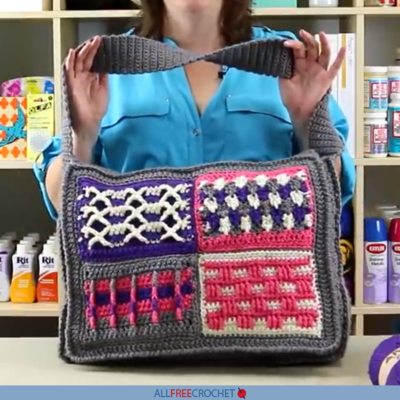
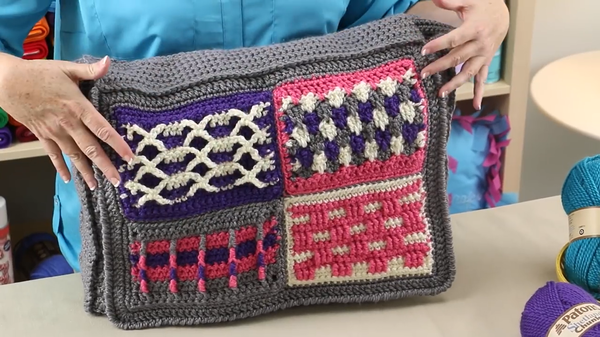
The Groovy Berry Crochet Messenger Bag is an easy crochet bag pattern that features four panels, each focusing and highlighting on a different stitch and a chance for you to work on your colorwork techniques.
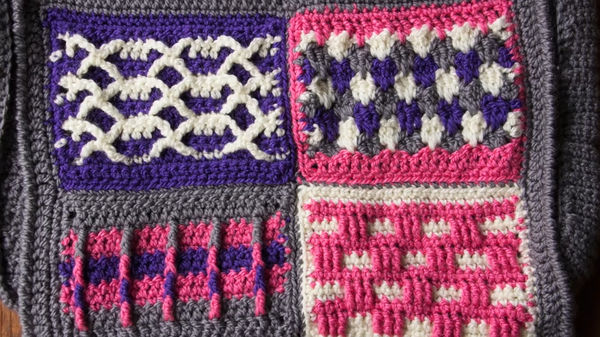
The purple and white "X" pattern at the top left corner uses the surface crochet technique that's so popular. It may look intimidating but with our help, it's not!
This unique crochet messenger bag pattern is a free design that's worked in parts, which makes it easy to follow for any skill level. Plus, there is a video tutorial for each section for you visual learners out there.
Since it's so eye-catching, let's discuss more details. The bottom left corner of this crochet bag features a variation of post stitch. The post stitch variation makes each color lay on top of the row below.
The front post stitch creates a two-color row, but you are only crocheting with one color at a time. The bottom right corner of the messenger bag features another variation of the post stitch, but this one only uses two colors total and creates a checkerboard pattern.
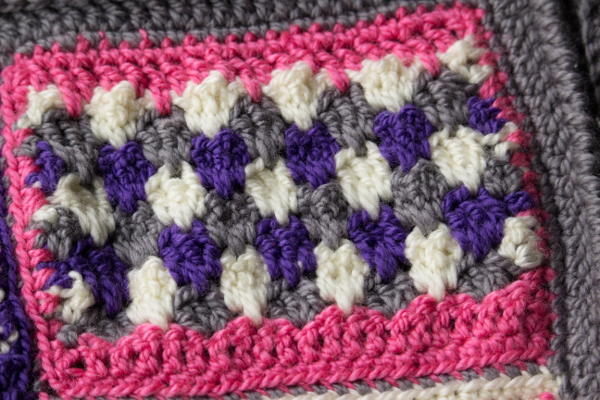
The top right corner of the messenger crochet bag features a reversible stitch pattern and slightly jagged crochet stitches - and you'll still only be working with one color at a time.
Once you finish all the individual panels, learn how to crochet the strap, front and back, and learn how to assembly everything at the end.
Sign Up For More Free Patterns >>
Crochet Messenger Bag Introduction and Overview
In the video below, Mary Beth walks you through the introduction of this project and the details of this bag so you can see the finished piece and learn about the stitches and assembly before getting started.
Crochet Messenger Bag Details & Materials Needed:
Skill Level: Easy
Crochet Hook: I/9 or 5.5 mm hook
Yarn Weight: (5) Bulky/Chunky (12-15 stitches for 4 inches)
Crochet Gauge: 11 sts and 5 rows = 4” in pattern for Back
Finished Size: 20” wide x 16” tall x 3” deep
Materials List:
Patons Shetland Chunky [75% acrylic/25% wool; 100 g; 148 m/135 yds); 5 skeins #24107878046 Oxford Grey (MC), 1 skein each #24107878310 Lilac Lace (A), #24107878008 Aran (B), and #24107878416 Pretty in Pink (C)
Crochet hook size I/9/5.50mm or size needed to obtain gauge
Tapestry needle
Groovy Berry Crochet Messenger Bag Pattern:
Panel One - Top Left
Multiple of 7+2
With A, ch 23.
Row 1: Sc in 2nd ch from hook and in each ch across. Ch 1, turn. 22 sts.
Row 2: Sc in each sc across. Extend your working loop so it does not unravel; do not turn work.
Row 3: With B, starting at beg of Row 2, sc in each of first 2 sc, *ch 7, sk 4 sc, sc in each of next 3 sc. Rep from * across; last rep will end with 2 sc. Extend working loop, turn.
Row 4: With A, ch 1, sc in each of first 2 sc, *hdc in each of next 4 (A) sc, holding ch-7 loops away from you, sc in each of next 3 sc. Rep from * across, last rep will end with 2 sc. Ch 1, turn.
Row 5: Sc in each st across. Extend working loop, turn.
Row 6: With B, ch 2, sl st in first sc, ch 3, dc in next sc, *ch 3, sc in ch-7 loop, ch 3, sk 4 sc, dc in each of next 3 sc. Rep from * across, last rep will end with 2 sc. Ch 1 turn.
Row 7: Sc in each of first 2 dc, *ch 7, sc in each of next 3 dc. Rep from * across, last rep will end with 2 sc. Extend working loop, turn.
Row 8: With A, ch 4, sc in each of first 2 sc, * tr in each of next 4 (A) sc, sc in each of next 3 (B) sc. Rep from * across, last rep will end with 2 sc. Ch 1, turn.
Rows 9 – 14: Rep Rows 5 – 8, then Rows 5 – 6 once more, do not ch-1, turn; end off B.
Row 15: Working in same direction as last row, place A loop on hook, ch 4, sc in each of first 2 dc, *tr in each of next 4 (A) sc, sc in each of next 3 (B) dc. Rep from * across, last rep will end with 2 sc. Ch 1, turn.
Row 16: Sc in each st across. End off.
Edging: With A, sc around finished rectangle placing 3 sc in each corner.
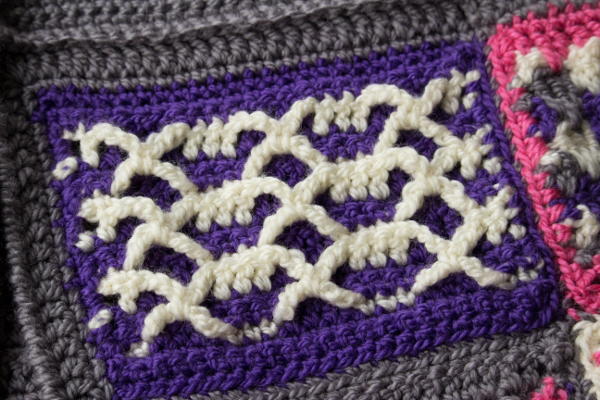
Part One Video:
If you are a visual learner, here's the video for this first section of the messenger bag. Click play to watch Mary Beth walk you through this first part.
Panel Two - Bottom Left
Multiple of 6
With B ch 24.
Row 1: Sc in 2nd ch from hook and in each ch across. Ch 1, turn. 23 sts.
Row 2: Sc in each sc across. Ch 1, turn.
Row 3: Sc in each sc across, change to C, ch 1, turn.
Row 4: Sc in first sc, FPtr 3 rows below each of next 3 sc, *sc in each of next 3 sc, FPtr 3 rows below each of next 3 sc.. Rep from * across, sc in last sc. Ch 1, turn.
Row 5: Sc in each st across. Change to B, ch 1, turn.
Rows 6 – 7: Rep Rows 2 – 3.
Row 8: Sc in each of first 4 sc, *FPtr 3 rows below each of next 3 sc, sc in each of next 3 sc. Rep from * across, last rep will end with 4 sc. Ch 1, turn.
Row 9: Rep Row 5.
Rows 10 – 18: Rep Rows 2 – 9, then Row 2 once more. End off.
Edging: With B, sc around finished rectangle, placing 3 sc in each corner.
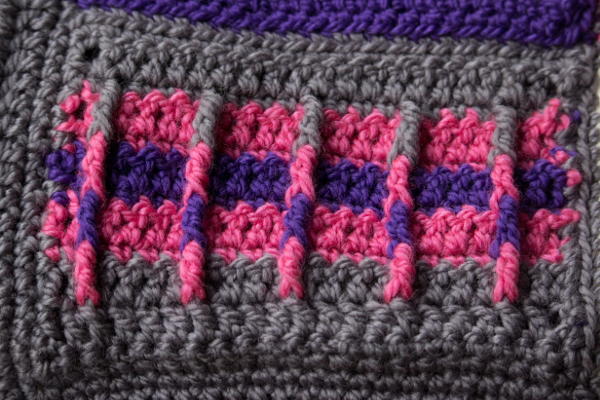
Part Two Video:
Visual learners, here's the video for this second section of the messenger bag. Click play to watch Mary Beth walk you through the bottom left piece.
Panel Three - Bottom Right
Notes: Do not cut yarn at the end of each color row, float the colors up the side for later use.
Dc counts as 1 dc.
With C, ch 23.
Row 1: Dc in 4th ch from hook and in each ch across. Change to MC, ch 3, turn. 21 dc.
Row 2: Sk 1 dc, 3 dc in next dc, (ch 1, sk 3 dc, 3 dc in next dc) 4 times, sk 1 dc, dc in last dc. Change to B, ch 3, turn.
Row 3: Dc in first dc, (ch 1, sk 3 dc, dc in next ch-1 sp, tr in center dc in shell below ch-1 sp, covering the ch-1, dc in same ch-1 sp) 4 times, ch 1, sk 3 dc, 2 dc in last dc. Change to A, ch 3, turn.
Row 4: Sk 1 dc, (dc in next ch-1 sp, tr in center dc in shell below ch-1 sp, covering the ch-1, dc in same ch-1 sp, ch 1) 4 times, sk 1 dc, dc in last dc. Change to MC, ch 3, turn.
Rows 5 – 9: Rep Rows 3 – 4 twice then Row 3 once more, but keep color progression as MC, B, A, MC, B, A etc. At end of Row 9, change to C.
Row 10: Dc in next dc, dc in center dc in shell below ch-1 sp, (dc in each of next 3 dc, dc in center dc in shell below ch-1 sp) 4 times, dc in each of last 2 dc.
Edging: With C, sc around finished rectangle, working 3 sc in each corner.
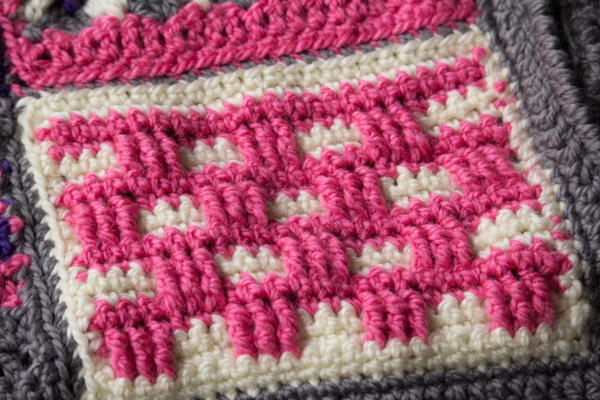
Part Three Video:
Visual learners, here's the video for this third section of the messenger bag. Click play to watch Mary Beth walk you through the bottom right piece.
Panel Four - Top Right
With MC, ch 23.
Row 1: Dc in 4th ch from hook and in each ch across. Ch 3, turn. 21 dc.
Row 2: Dc in each dc across. Change to C, ch 1, turn.
Row 3: Sc in each of first 2 dc, FPtr in row below next dc, (sc in each of next 3 dc, FPtr in row below next dc) 4 times, sc in each of last 2 dc. Ch 3, turn.
Row 4: Dc in each st across. Change to A, ch 1, turn,
Row 5: Sc in each of first 2 dc, FPtr in FPtr, (sc in each of next 3 dc, FPtr in next FPtr) 4 times, sc in each of last 2 dc. Ch 3, turn.
Row 6: Dc in each st across. Change to C, ch 1, turn.
Rows 7 – 8: Rep Rows 5 – 6. Change to MC, ch 1, turn.
Rows 9 – 10: Rep Rows 5 -6. End off.
Edging: With MC, sc around finished rectangle, working 3 sc in each corner.
Part Four Video:
Visual learners, here's the video for this fourth section of the messenger bag. Click play to watch Mary Beth walk you through the top right piece.
This is how the panels should look:
Crochet Messenger Bag Pattern: Finishing
Strap/Gusset:
With MC, ch 11.
Row 1: Sc in 2nd ch from hook and in each ch across. Ch 1, turn. 10 sc.
Row 2: Sc in each sc across. Ch 1, turn.
Rep Row 2 for pattern until strap measures 80” (or desired length), end off.
In the model shown I did a 20” section in Color A to make the MC yarn last longer but you can make it all solid if you invest in another skein of MC.
Back:
With MC, ch 55.
Row 1: Sc in 2nd ch from hook and in each ch across. Ch 3, turn. 54 sc.
Row 2: Dc in each sc across. Ch 1, turn.
Row 3: Sc in each dc across. Ch 3, turn.
Rep Rows 2 – 3 for pattern until work measures 16” tall, ending with a Row 3. End off.
Front:
Rep all instructions for Back.
Top Gusset:
With MC, ch 55.
Row 1: Sc in 2nd ch from hook and in each ch across. Ch 1, turn. 54 sc.
Row 2: Sc in each sc across. Ch 1, turn.
Rep Row 2 for pattern until work measures 3”. End off.
Finishing:
Flap:
With MC, sc 4 colorwork panels together in order shown in photo, or desired order.
With MC, with RS facing and starting in top right corner, work 1 rnd sc around assembled flap, working 3 sc in each corner.
With MC, work crab st along right side, bottom, and left side of flap. End off.
Bag Assembly:
Sew beginning of strap/gusset to end of strap/gusset, being careful not to twist it.
Pin Back and Front to each side of Gusset, aligning color change section with bottom of bag if you made a 2-color gusset.
With RSs facing you each time and MC, sc Front and Back to Gusset, working 3 sc in each corner.
Top Gusset:
Pin Top Gusset into place with one long edge along top of Back and one long edge along top of Flap. With RSs facing you each time, and MC, sc Top Gusset into place.
Weave in all ends.
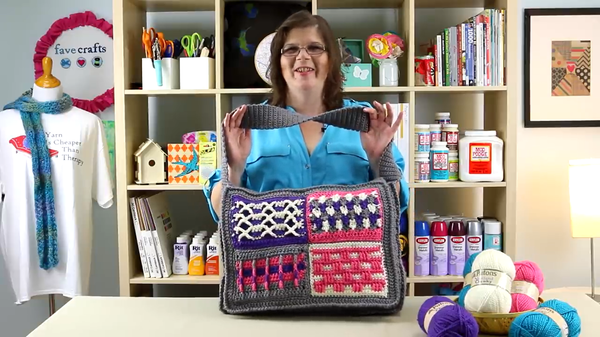
Crochet Messenger Bag Assembly Video:
Now that you've crocheted all the pieces, see how this beautiful crochet bag pattern is put together. This assembly video right below will walk you through how it all comes together.
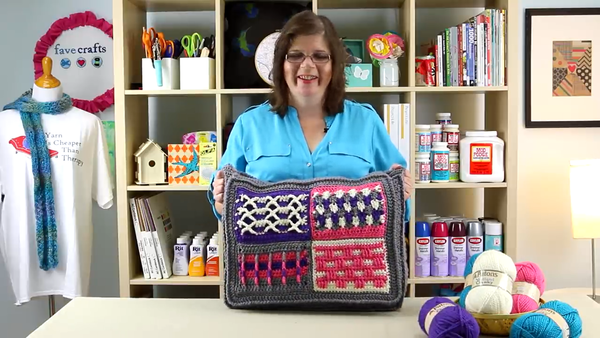
Groovy Berry Crochet Messenger Bag Pattern (Free): Images
For more images, take a look at these right below. How is your bag looking? Let us know in the comments how you liked this bag!
Up Next
24 Crochet Purse Patterns >>>
What's your favorite panel of this bag?
Let us know in the comments!

