Pascal C2C Baby Blanket
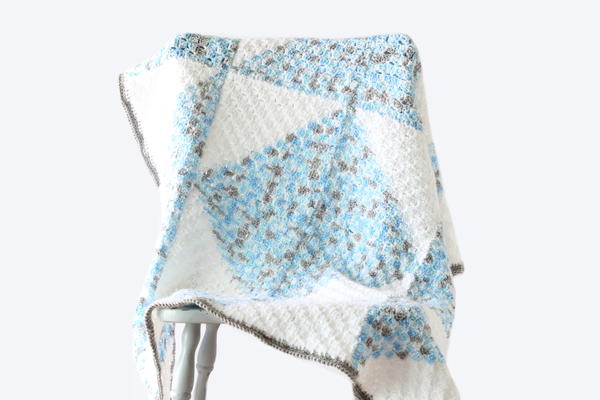
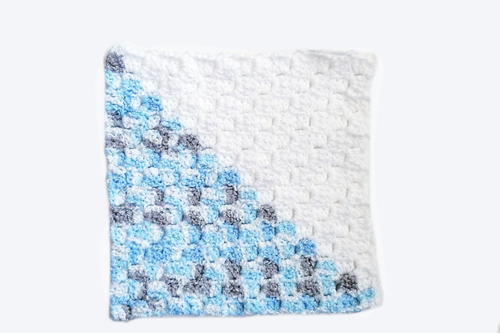
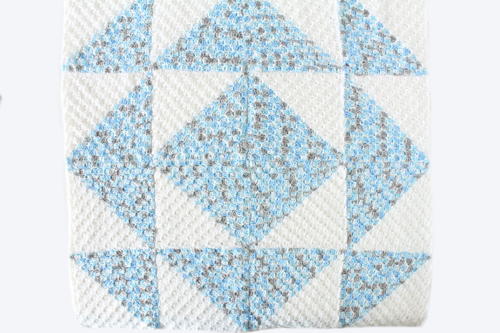
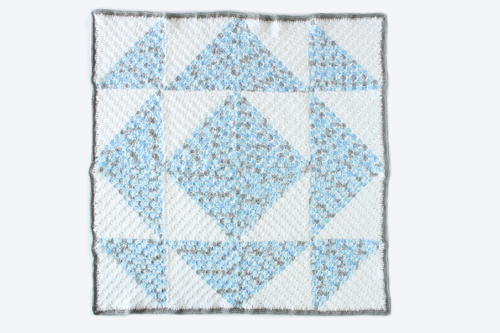
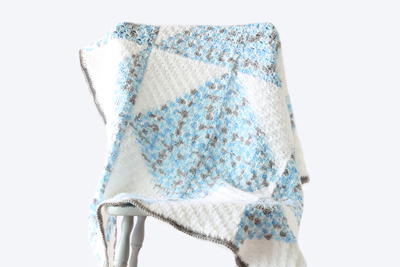
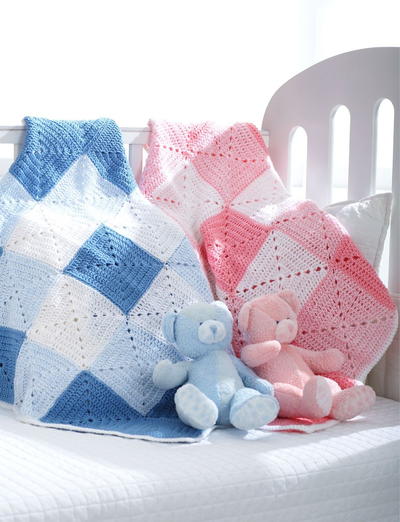
The Pascal C2C Baby Blanket is the perfect baby blanket pattern if you love having room to play around with the design! This pattern was inspired by quilts and how you can start with just a few simple triangles to make a ton of different designs when they all come together. This baby blanket pattern uses C2C squares to achieve the same thing. With this pattern, you can arrange the squares into any design you like and really create something of your own. Or you can work the blanket as one C2C square following the design I used! Either way, have fun.

Crochet HookH/8 or 5 mm hook
Yarn Weight(3) Light/DK (21-24 stitches to 4 inches)
Crochet Gauge1.5 blocks per inch
Finished Size38 x 38 inches
Materials List
- #3 DK weight yarn in 2-3 colors - I used Bernat Baby Coordinates in Dove Boy (2) and White (3), and some scrap gray for the border
- 5.00mm crochet hook
- Tapestry needle
Instructions
Abbreviations:
- ch - chain
- SC - single crochet
- DC - double crochet
- sl - slip stitch
If you already know how to C2C, skip to the end for the chart.
Blanket Instructions
-
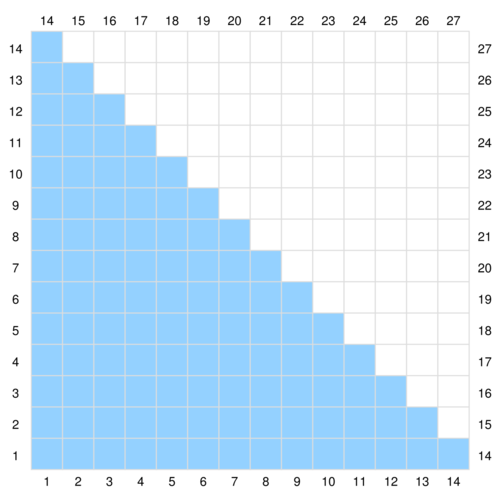
Row 1: Make a slip knot and chain 5 with the blue yarn. YO and double crochet into the 3rd space from the hook and each space after. That's the first block done and it makes up that first corner.
-
Row 2: Chain 5 to start the next row and DC 3 starting from the 3rd space from the hook. With the two blocks stacked on top of each other, rotate the bottom one so that the ch 2 space lines up with where your hook is now. Slip stitch to the chain 2 space of the last row. This brings the two blocks together. Then chain 2 and work 3 DC into the chain 2 space to form the next block.
-
Rows 3-14: Chain 5, and DC 3 starting from the 3rd space from the hook. Rotate the work and sl st to the top of the ch 2 space of the last block. *Ch 2, DC3 into the chain 2 space, slip st to the top of the next block*. Repeat from * to * until the end of the row.
-
Begin Decreasing.
-
Row 15: Switch to the white yarn. Slip stitch 3 times into each of the next 3 spaces. Because you didn't chain 5 and work the DCs, you didn't add another block. Instead, you flattened that side to create the top edge of the piece. Work the rest of the row the same way you've been working this entire time. But instead of working the last block, your row ends when you slip stitch to the top of the last blue block.
-
Rows 16-27: Then, turn the work and repeat row 15 to decrease each row by one block until you’ve completed the square. Then bind off.
-
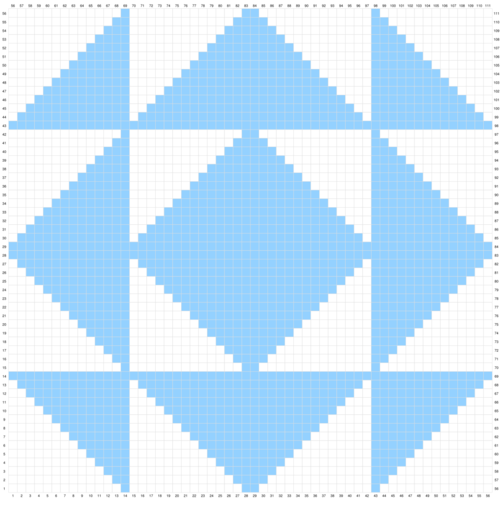
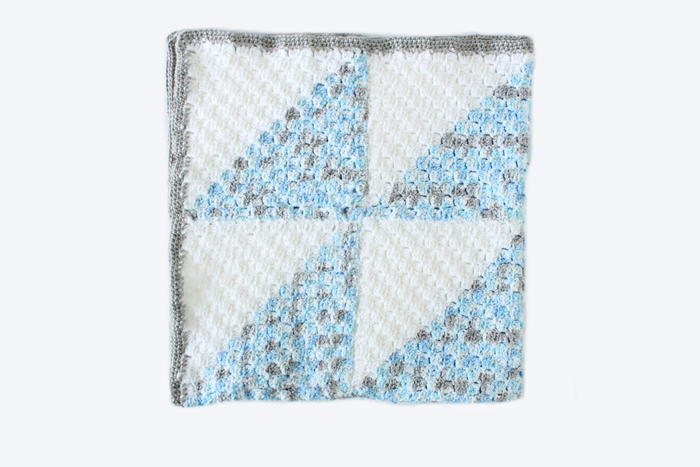
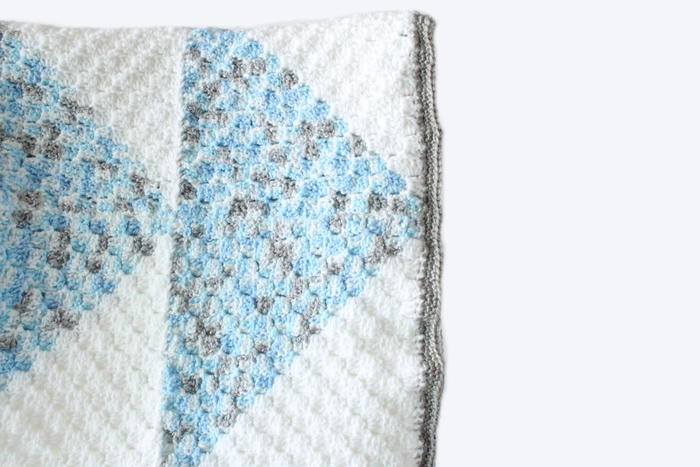
Make 16 squares in this way and then arrange them however you like. Check out the chart below to see how my blanket is laid out. Then use a length of white yarn and whip stitch the rows together, then whip stitch the columns together to bring the blanket into one piece. Finally, weave in all the ends.
Editor's note: click on images below to enlarge. -
Option 2: Using the same C2C method, work the entire blanket in one piece using the chart provided below. This is better for those that are slightly more advanced or just don’t want to deal with seaming the squares together!
Border
-
Once the blanket is in one piece and the ends are woven in, attach gray yarn to any side and SC along the edge of the blanket. At the corner space, *SC 1, ch1, SC 1* into the same space, then turn and SC to the next corner. Repeat from * to * in each corner.
-
Work as many rounds of SC for the border as you like. I worked 4 rows for a narrow border on mine. Then bind off, weave in any loose ends and you’re done!
Read NextBeginner Baby Blanket

