This project was submitted by one of our readers, just like you.
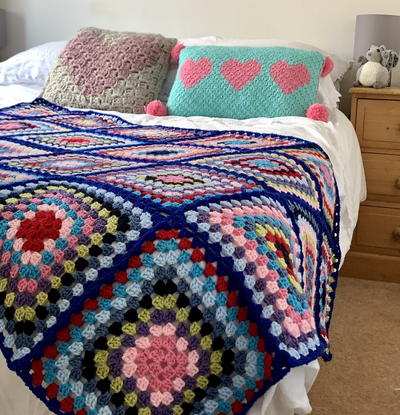
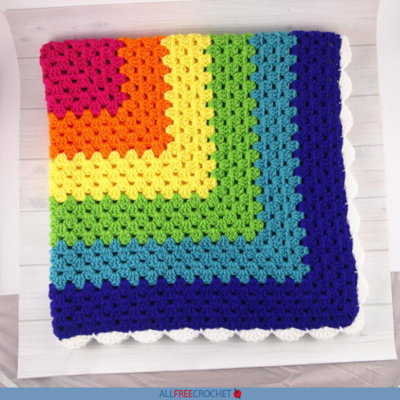
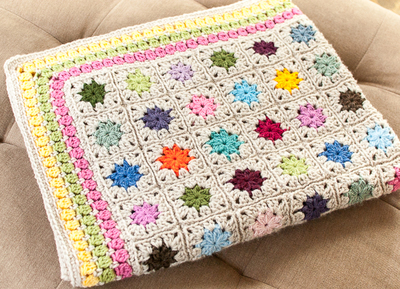
Blue Agate Granny Square Crochet Blanket

Blue Agate Granny Square Crochet Blanket
"This blue agate crochet blanket was a joy to make. The process of crocheting each square, joining them, and adding a beautiful crochet border is so relaxing.This is the second granny square blanket of a 6 part series on a few easy, yet pretty crochet edges that can be added to the throws. I will have both written directions and video tutorials for each one. Enjoy creating your own beautiful blankets using this series. Square One Consists of four rounds of Deft Blue and two rounds of Charcoal. Square Two consists of four rounds of Light Blue and two rounds of Dusty Grey.Why Blue Agate Crochet Blanket? My dear mother-in-law grew up in Upper Michigan near the shores of Lake Superior. You can walk the beaches and find beautiful gem stones in the cold, clear water. The town she lived in used to be a booming mining town. We would go there and go Agate searching each summer. The crochet borders on this throw remind me of those beautiful gems."
NotesThe pattern on the website includes links for a video tutorial on the magic circle, granny square, invisible join, and border. A total of 20 squares. 10 squares with four rounds of light blue and two rounds of dusty grey. 10 squares with four rounds of deft blue and two rounds of charcoal.
The blanket is four squares wide and five squares long.

Crochet HookH/8 or 5 mm hook
Yarn Weight(4) Medium Weight/Worsted Weight and Aran (16-20 stitches to 4 inches)
Crochet GaugeEach square is approximately 6 3/4 inches around.Six Rounds
Finished SizeSize is approximately 31.5 inches wide by 39 inches long.
Materials List
- Charcoal Red Heart. 3 Skeins or 1092 yards.
- Dusty Grey Red Heart. 2 Skeins or 728 yards.
- Deft Blue Red Heart 2 Skeins or 728 yards.
- Light Blue Red Heart 2 Skeins or 728 yards.
- Size H crochet hook
- Scissors
- Yarn Needle
Instructions
-
Begin by making a Magic Circle.
Round 1: For this round, you will be working inside the magic circle. chain 3 and count this chain 3 as your first DC of this round and throughout the entire pattern. Continuing working in the ring, work 2 DC. Then chain 3. 3 DC, CH 3, 3DC, CH3, 3DC, CH3 and join into the top of the beginning chain. This join completes the first shell of the first round. (note, you should have 4 clusters of 3 DC with 4 areas of CH 3 between) -
Round 2: Make 4 CH, this will count as your first DC plus a 1 CH. Then in the first CH 3 space, work *3 DC, 3 CH, 3 DC and CH 1*. Continue the stitch pattern between the * until the last 3-ch space. In the last CH 3 SP, work the 3 DC, 3 CH, then work only 2 DC and join with a SL ST into the 3rd chain of the beginning CH. This join will complete the last shell of the round. You should have 8 shells and 8 chain 3 spaces.
-
Round 3: Make 3 CH, then Insert the hook into the CH 1 SP from the previous row, (should be right where the previous row ended). YO and work a DC, Insert hook again, YO and DC. (This completes your first 3 DC in the round). CH 1. In the corner CH 3 SP work *3 DC, 3 CH, 3 DC. and 1 ch. In the next 1-ch space work 3 DC and 1 CH. Repeat from * until all 4 sides are complete. After the last DC in the CH 3 space CH 1 and SL ST into the top ST of the first DC of this round.
You should have 12 shells and 12 spaces after the completion of this round. -
Round 4-6: Repeat rounds 2 and 3.
-
Granny Square Color: Remember, in this granny square, the deft blue is done for the first 4 rounds, then rounds 5 and 6 it is the charcoal. For the other square, it is 4 rounds of the light blue and 2 rounds of the dusty grey.
I made 10 of each square. -
Finishing Each Square: Pull the yarn through the last ST. Using the yarn needle, weave the yarn back and forth through the crochet stitches until a bit snug. cut off excess.
Invisible Join Written Directions
Step-by-Step Joining Directions
Starting in the horizontal thread inside the chain in the corner stitch, insert the yarn needle and pull the yarn through. (don’t snug up the yarn just yet).
In the opposite square and insert the yarn needle into the next horizontal yarn piece in the next stitch.
Come back to the first square and insert the yarn needle into the next horizontal yarn piece in the next stitch.
Continue for 2 or 3 more horizontal yarn stitches.
Then holding the starting yarn stitch in the corner, pull the yarn snug.
Your granny squares will be snug and invisibly joined for the stitches that you have worked. Continue moving back and forth between the two squares and weaving the yarn through the horizontal stitches. Every 3 or 4 stitches, pull the yarn snug.
Align the Corners
Insert the yarn needle in all the corner stitches of the squares being joined together, and pull through the yarn. Then continue weaving back and forth through the horizontal stitches.
Every 3 or 4 stitches, pulling the yarn snug.
Weave in the Yarn Ends
Before working on the border, I took the time to weave in all the yarn pieces using the yarn needle.
Crochet Border Directions
-
Round 1: Join light blue yarn in a CH 1 SP. [CH 3 (this counts as your first DC), 2 DC, CH 1] Repeat between [ ] until you reach the corner. Then in the CH 3 space, work 3 DC, 3 CH, 3 DC and CH 1. Continue the stitch pattern between the [ ] for the sides and in each corner work the ( 3 DC, 3 CH, 3 DC and CH 1). End with a SL ST into the 3rd chain of the beginning CH.
-
Round 2: Join Dusty Grey yarn in a CH 1 SP. [CH 3 (this counts as your first DC), 2 DC, CH 1] Repeat between [ ] until you reach the corner. Then in the CH 3 space, work 3 DC, 3 CH, 3 DC and CH 1. Continue the stitch pattern between the [ ] for the sides and in each corner work the ( 3 DC, 3 CH, 3 DC and CH 1). End with a SL ST into the 3rd chain of the beginning CH.
-
Round 3: Join Deft Blue yarn in a CH 1 SP. [CH 3 (this counts as your first DC), 2 DC, CH 1] Repeat between [ ] until you reach the corner. Then in the CH 3 space, work 3 DC, 3 CH, 3 DC and CH 1. Continue the stitch pattern between the [ ] for the sides and in each corner work the ( 3 DC, 3 CH, 3 DC and CH 1). End with a SL ST into the 3rd chain of the beginning CH.
-
Round 4: Join Charcoal yarn in a CH 1 SP. [CH 3 (this counts as your first DC), 2 DC, CH 1] Repeat between [ ] until you reach the corner. Then in the CH 3 space, work 3 DC, 3 CH, 3 DC and CH 1. Continue the stitch pattern between the [ ] for the sides and in each corner work the ( 3 DC, 3 CH, 3 DC and CH 1). End with a SL ST into the 3rd chain of the beginning CH.
-
Finishing: Weave in all the ends and cut off excess yarn.

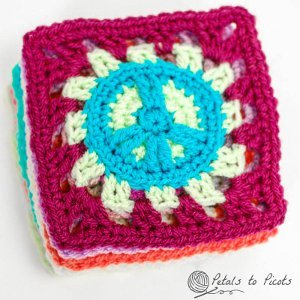
Read NextRetro Peace Sign Square