How to Dye Yarn
Use these yarn dying techniques to dye cotton, wool, or acrylic yarn.

Crocheting is one of the most relaxing, fun, and rewarding crafts. The endless colors and varieties of yarn available to crochet with are one big reason it’s loved around the world!
But what if you can’t find the exact color (or combination of colors) you want?
Dyeing the yarn will allow you to create custom hues to coordinate with your crochet projects! It’s relatively easy to add color using fabric dye or natural materials you might have around the house. Let’s go through the different kinds of yarns that can be dyed, then discuss the supplies and steps that are needed for this process!
Natural vs Synthetic Yarns:
Yarn can be made from many different kinds of fibers. From natural wools, cotton, and bamboo to synthetic fibers like acrylic and polyester, there are a lot of choices. Just like working with fabrics, yarns made from natural materials tend to adsorb dye better than synthetic fibers.
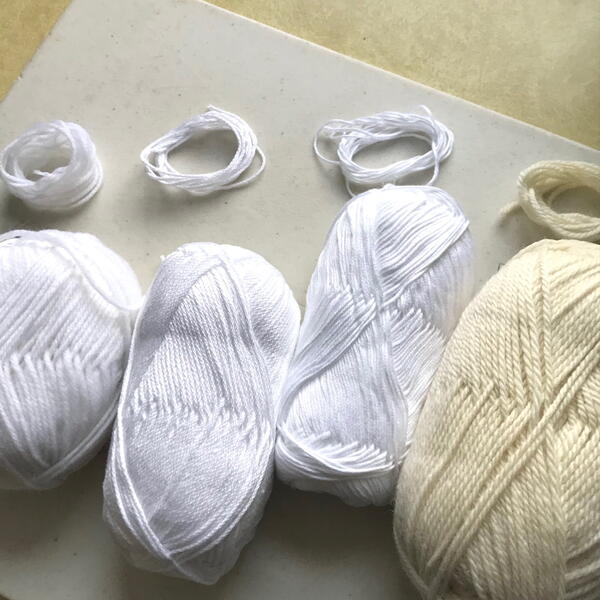
Cotton, bamboo, wool, and acrylic yarns were all dyed for this tutorial (photos below). The outcomes will vary based on the type of dye and yarn used, so test pieces are a great idea! Snip off a few short sections of yarn to use as trial swatches before dyeing the whole skein.

Different Types of Dyes:
Much like the content fibers of yarn, there are many different kinds of dye that can be used. The most commonly-utilized for this process are fabric dyes. These can be purchased online or at craft and fabric stores, and they come in dry (powdered) or liquid formulas. Other dyes including food coloring and tea were used for this tutorial. The results can be seen below!
Recommended Materials:
- yarn (lighter colors will show dye more)
- fabric dye (or natural dye, etc.)
- fabric scissors
- disposable gloves (optional but highly recommended)
- bowl or pot for dyeing (don’t use nice kitchenware for this)
- plastic squirt bottle (optional)
- paper towels
- clothespins (optional)
- clothesline (optional)
- tongs (optional)
Approximate time to complete: 1 hour (not including drying time)
Step 1:
To begin, be sure the yarn that will be dyed is clean and free of any dirt, debris, hairs and any other random fibers. Shake the skein of yarn off to remove these, and use a piece of tape for the stubborn remnants (just don’t damage the yarn’s fibers).
Step 2:
Prepare the dye bath on a covered workstation. Mix the dye with warm water according to the package’s directions. You can use more than one color of dye, and either mix them together (for custom colors) or keep them separate (and apply only in certain areas).
Step 3:
Carefully pour the dye into your plastic bottle (if you are using one). The bottle may give you more control when applying the dye, but it is optional.
Step 4:
Place the yarn in an empty bowl for dyeing if using a squirt bottle, or directly into the dye bath if submerging the whole skein. Use the squirt bottle if you prefer to spot-apply the dye, leaving areas of the yarn white. Those sections can be dyed later with another color if preferred.
Cotton yarn submerged in dye
Wool yarn dyed using squeeze bottle
Step 5:
Check the yarn periodically by lifting it up slightly from the dye bath. You may want to use tongs for this step.
Step 6:
After the yarn has adsorbed the amount of dye you prefer, slowly lift it out of the bowl. Allow the excess liquid to drip off back into the dye bath or bowl.
Step 7:
Once it stops dripping, rinse the yarn with clean, cool water. The water will run clear when it is done rinsing.
Step 8:
Now, allow the yarn to dry fully. The amount of time this takes will vary by your yarn type, the temperature, humidity, etc.
There are a few ways place the yarn for drying.
- Lay the yarn out on a (covered) table and blot dry.
- Dry outside on a clothesline (using clothespins or other clips).
- Spread out on paper towels and then gently roll and blot dry.
Give the yarn enough time to fully dry before using it, and be careful of any dye transfer onto other fabrics and materials.
Rayon yarn after drying
Step 9:
Use the custom yarn to crochet (or for another project)!
Examples of Different Yarn Materials and Types of Dye
Wool yarn finished product
Acrylic yarn dyed with food coloring
Cotton yarn finished product
About the Author:
Rebecca George is a handmade blogger and owner of the Chicago-based fashion line Purple and Lime. See her other articles written for Prime Publishing by visiting her designer profile on AllFreeSewing here.
Have you tried to dye yarn before?
