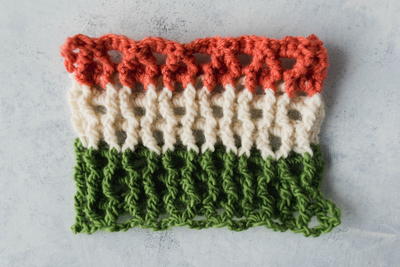
How to Crochet the Honeycomb Stitch

This How to Crochet the Honeycomb Stitch is a great video tutorial guide to show you step by step how to make a wonderful project using this stitch. Work this stitch into your next fun crochet blanket, or even a nice chunky scarf pattern.
No matter what kind of crochet project you are trying to make this honeycomb stitch is definitely a fun and inventive way for you to work through a new project. Plus, this crochet video shows you step by step how to achieve this stitch and master it!

Materials List
- Yarn
- Crochet hook
How to Crochet the Honeycomb Stitch
Honeycomb Stitch Crochet Tutorial
-
Chain any multiple of 3 sts + 2 to begin. To get the full honeycomb effect, start with a starting chain of at least 14.
-
Row 1: (RS) dc in 4th ch from hook, sk 2, (dc, ch 3, dc) in next ch, [sk 2, (dc, ch 3, dc) in next ch] across the row until you get to the last stitch. Sk 2, 1 dc in the last stitch.
-
Row 2: (WS) Ch 3, turn, bpdc in next dc, [3 sc, bpdc in next 2 dc] across your row, ending with 3 sc, one bpdc and only one single dc stitch.
-
Row 3: (RS) Ch 4 turn, [fpdc in next st, sk 3, fpdc in next st, ch 3] across your row until the end where you will ch 1 and dc in beg ch 3.
-
Row 4: (WS) Ch 3, turn, sc in first ch-sp. [bpdc in next 2 sts, 3 sc in chain sps] across the row until the end where you will end with 1 sc in last ch-sp and 1 dc in beg ch 3 top.
-
Row 5: (RS) Ch 3, turn. Sk st, [fpdc in next st, ch 3, fpdc in next st, sk 3] across row until the very end, finishing with a dc in beg ch 3 top.
-
Repeat rows 2-5 until your work is the length you want.
